
Here we show how to obtain and reconstruct a high quality DYNA in an awake patient.
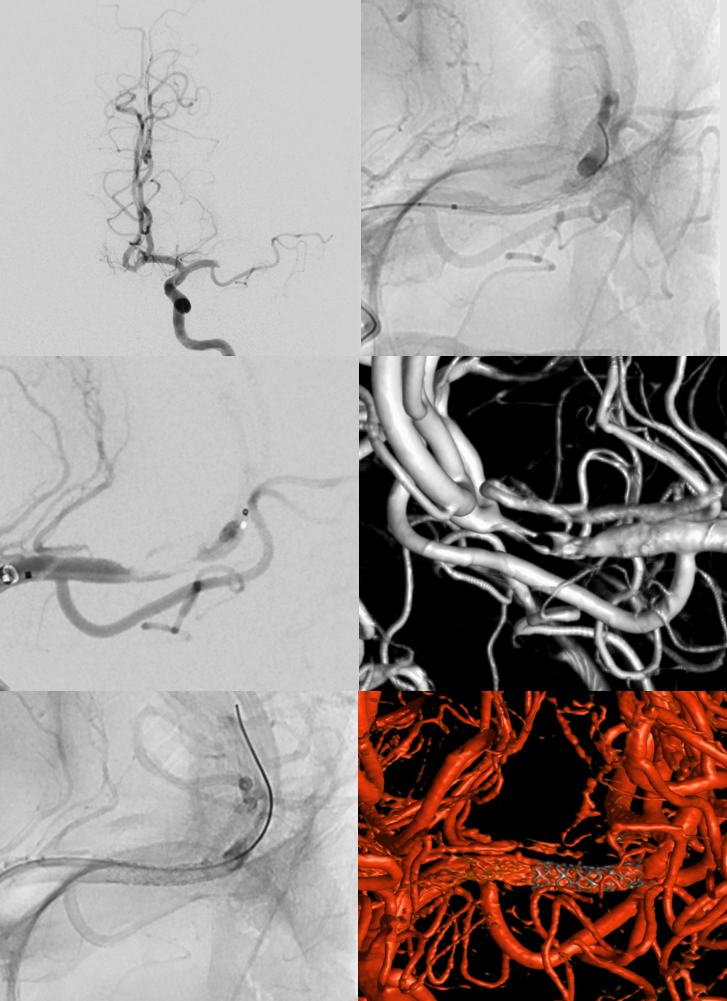
This patient presented with a left M1 dissection — ultimately requiring Onyx stenting after it almost re-closed post Comaneci Plasty. Post-procedure 5 sec micro DYNA is on the bottom.
Siemens Q. 5 sec 22 cm FOV “micro” no binning. Injection 3 cc/sec for 21 cc 2 sec delay.
Notice artifact proximal to the stent. Patient is under general anesthesia.
Six months later, he presents for followup, having made complete recovery
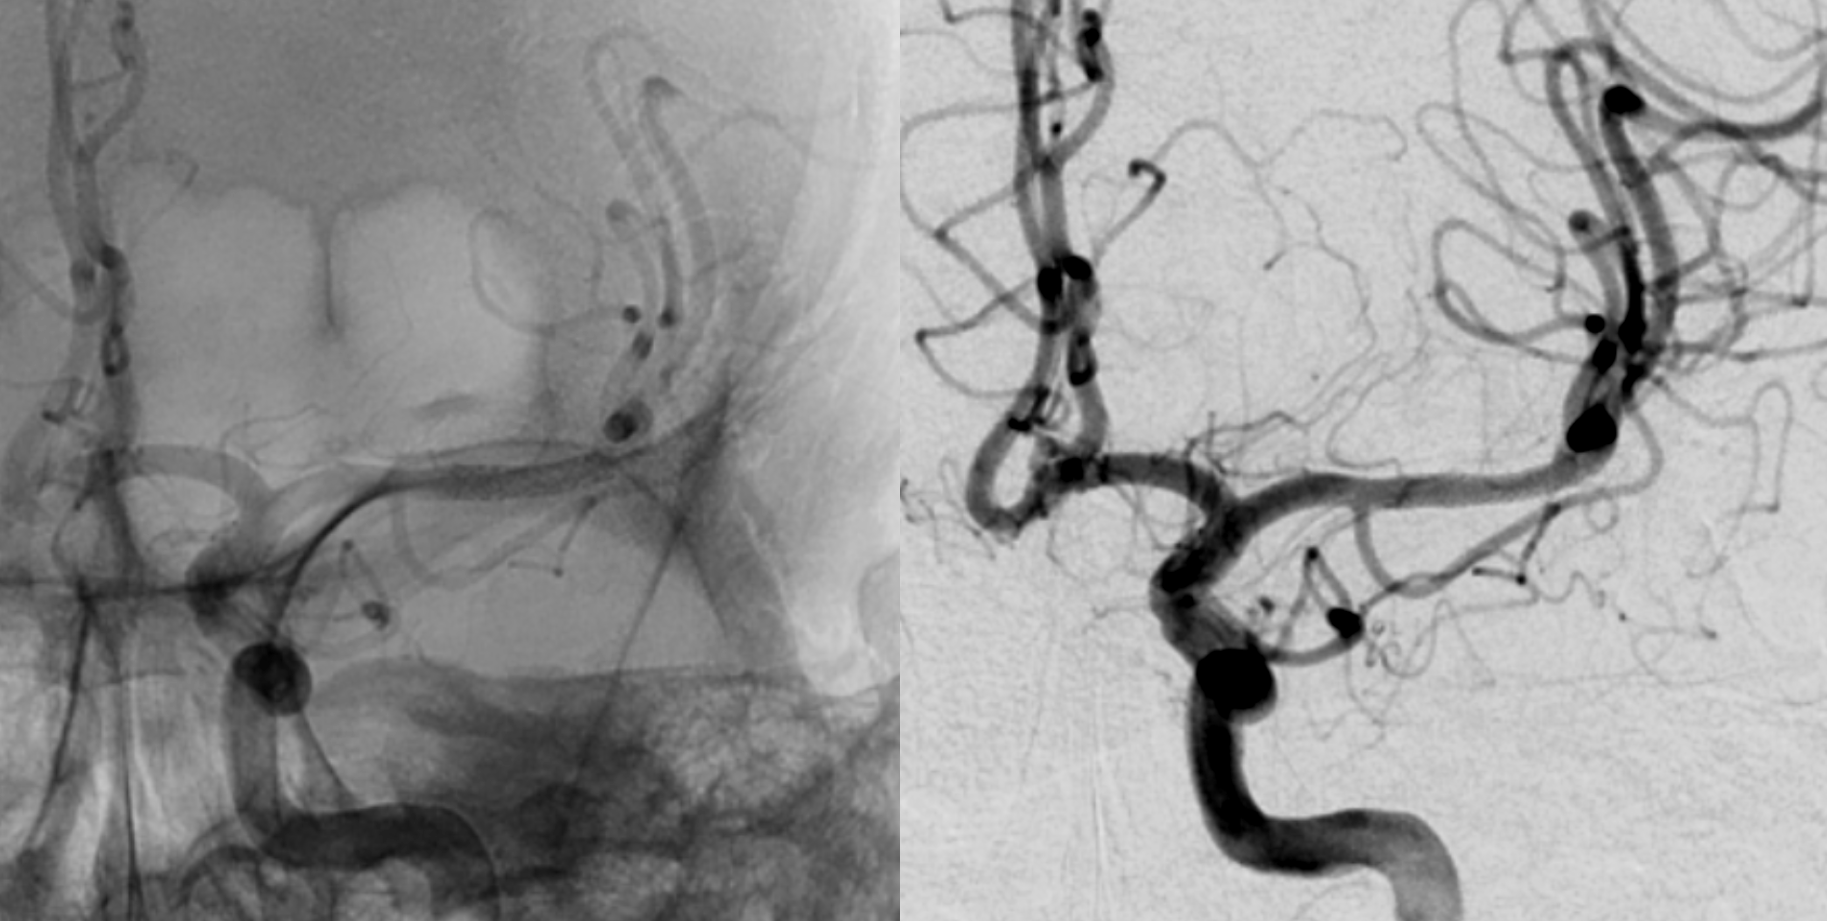
Cooperative patients can have excellent DYNAs. Best to do it without or with minimal sedation so they can follow directions.
Put object of interest in center. Siemens Q 5 sec dual phase (mask and fill) imaging gives great results when patients are still. Its much harder to hold still for a 10 sec injection so best to do with short ones.
Siemens Q. 5 sec 22 cm FOV “micro” no binning. Injection 3.5 cc/sec for 25 cc 2 sec delay.
Mask phase
Fill phase
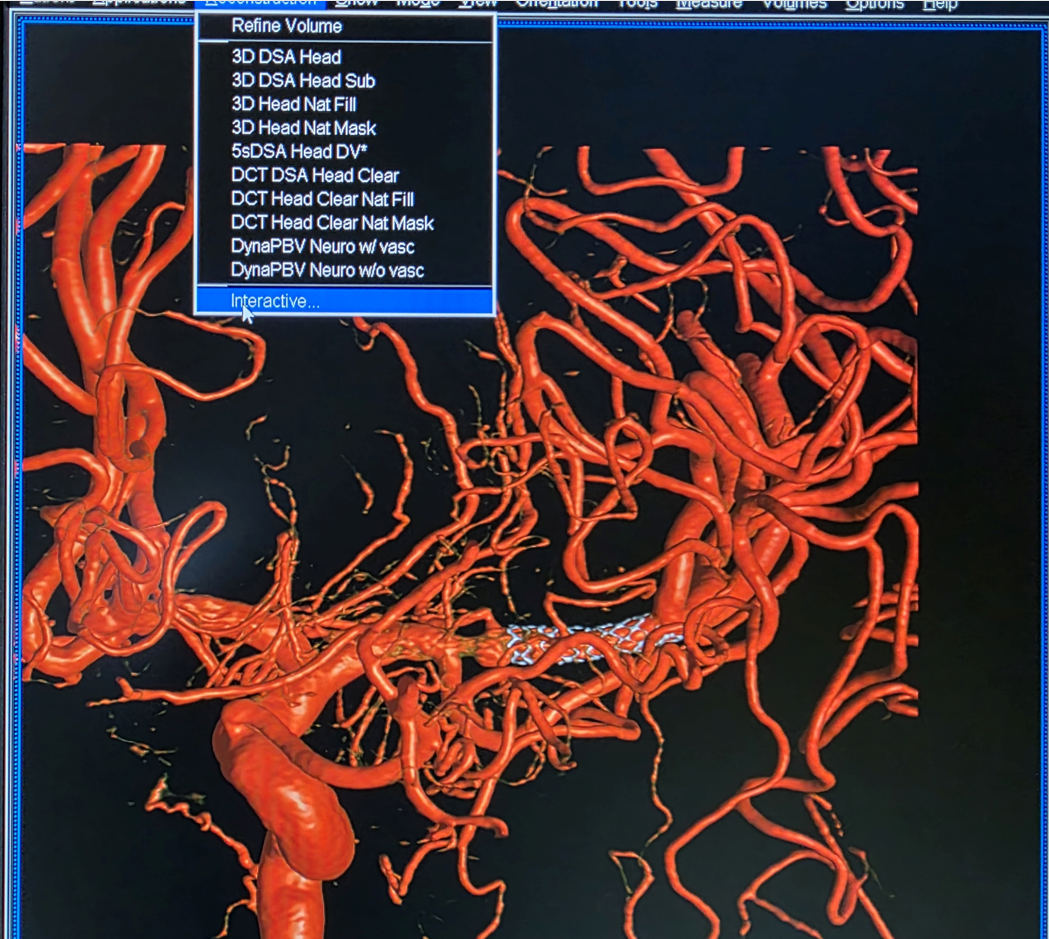
Generic recon is pretty good — not much needs to be done really
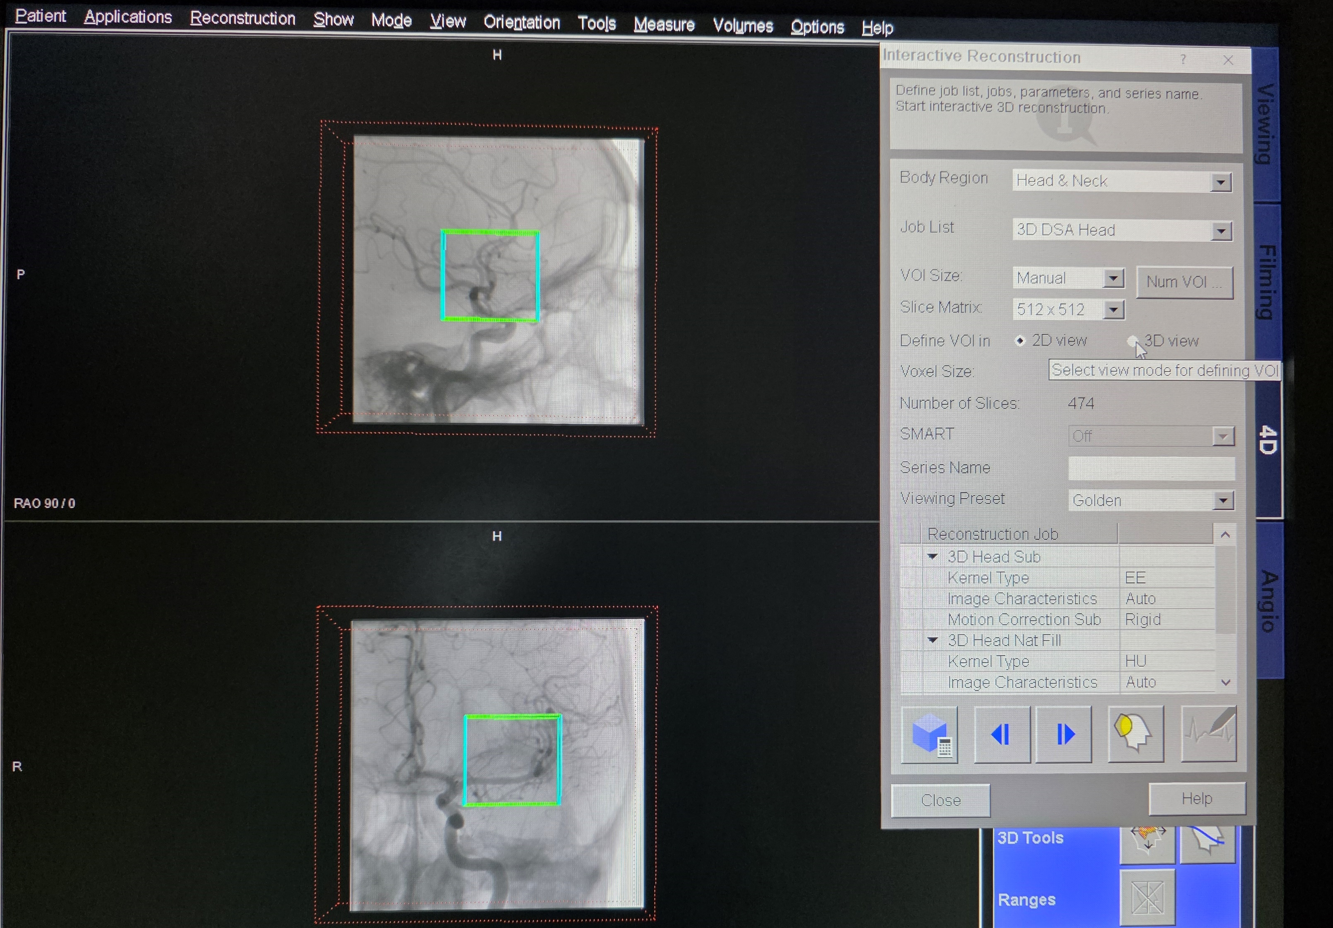
Lets say u want to do a “secondary reconstruction” to make it better. Choose “Interactive” from “Reconstruction menu”
Use “2D” or “3D” view to select your region of interest

Presets for box sizes — small medium full etc or adjust yourself
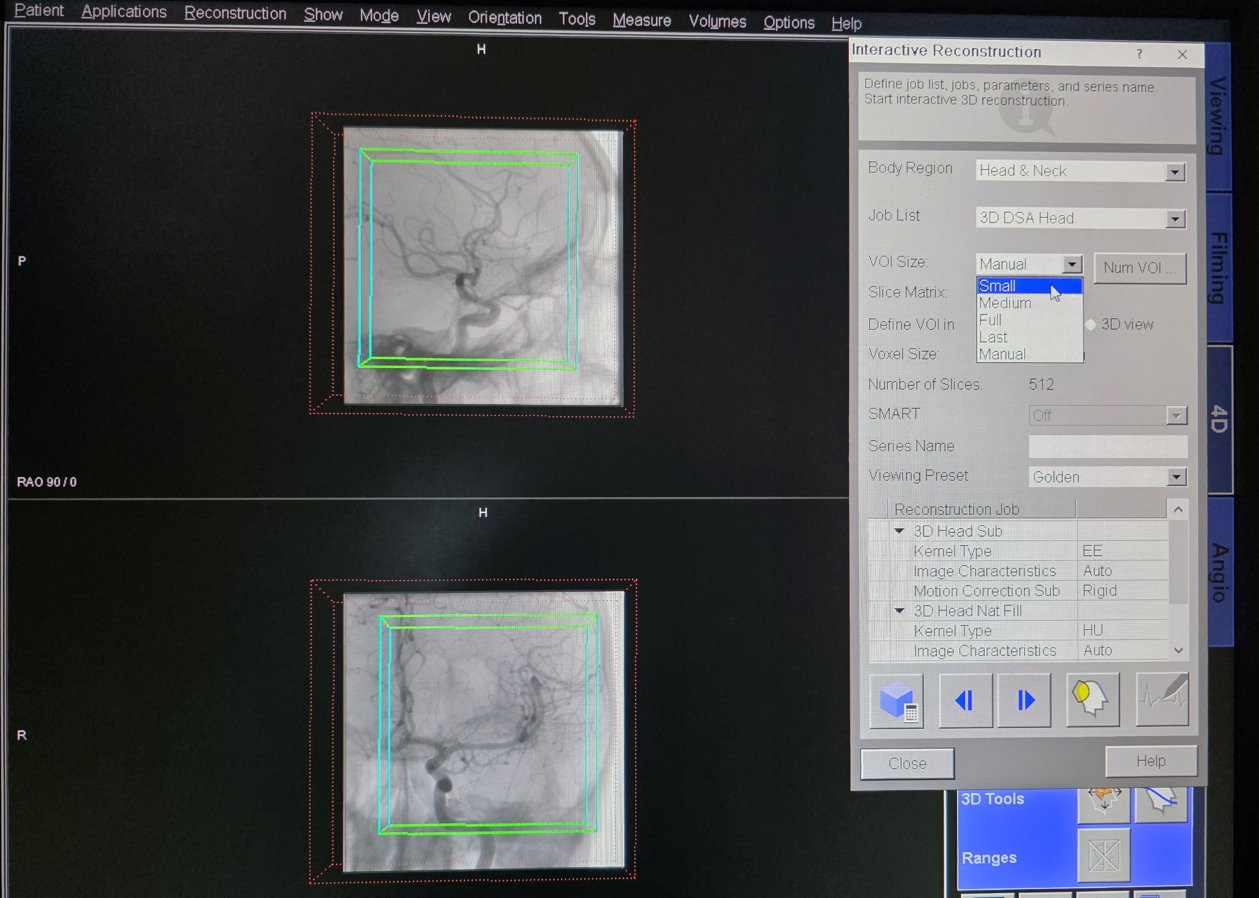
Small VOI — centered on the stent. 3D view can help too
The reconstruction can be done in Auto Normal Sharp Smooth or Very Smooth modes. Choose whichever one works best for you. Generally Normal or Sharp are good for us. You need to choose that separately for all 3 series — mask, fill, and sub
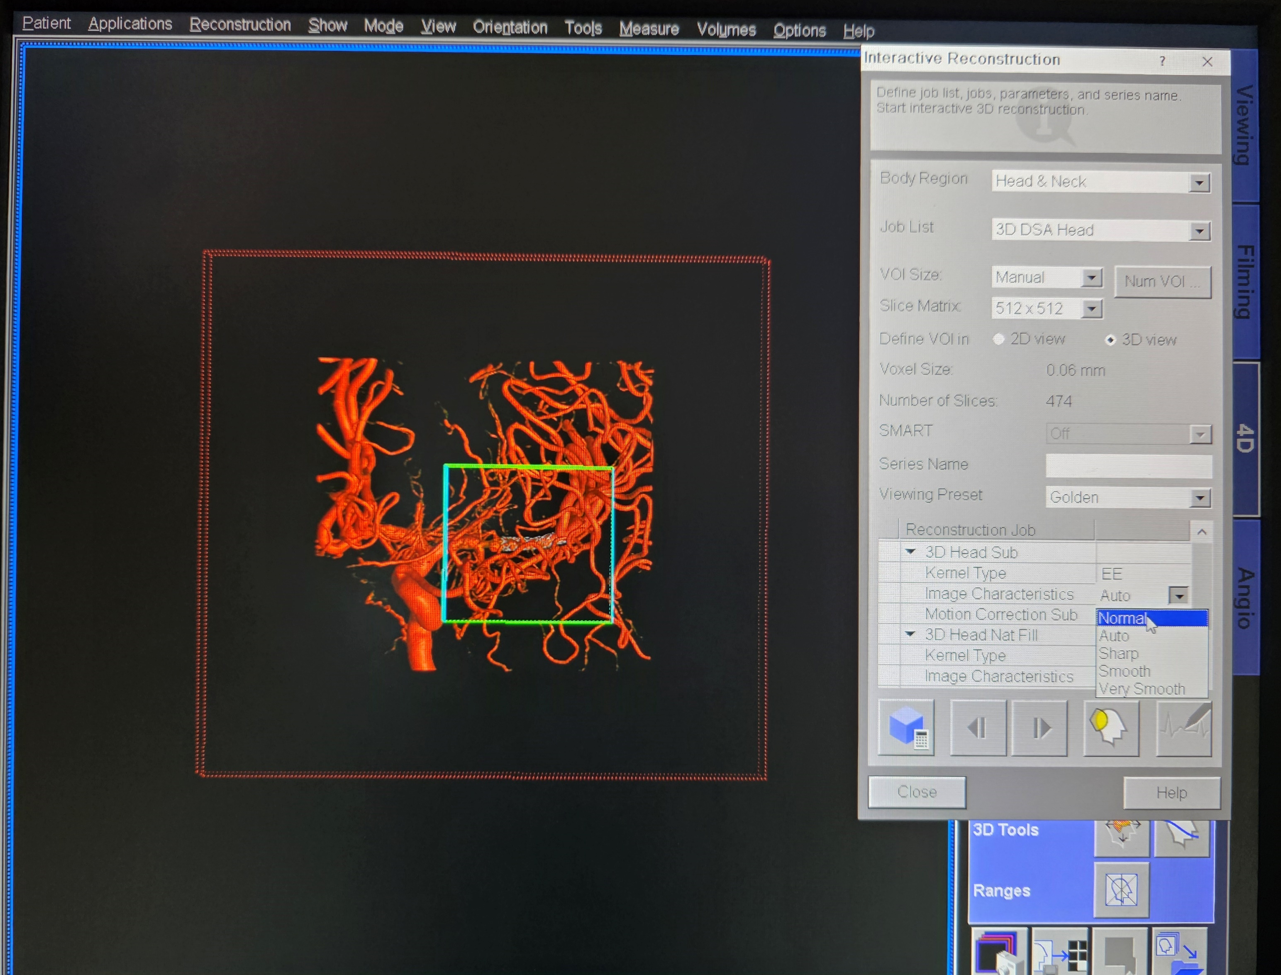
Chose normal for all 3
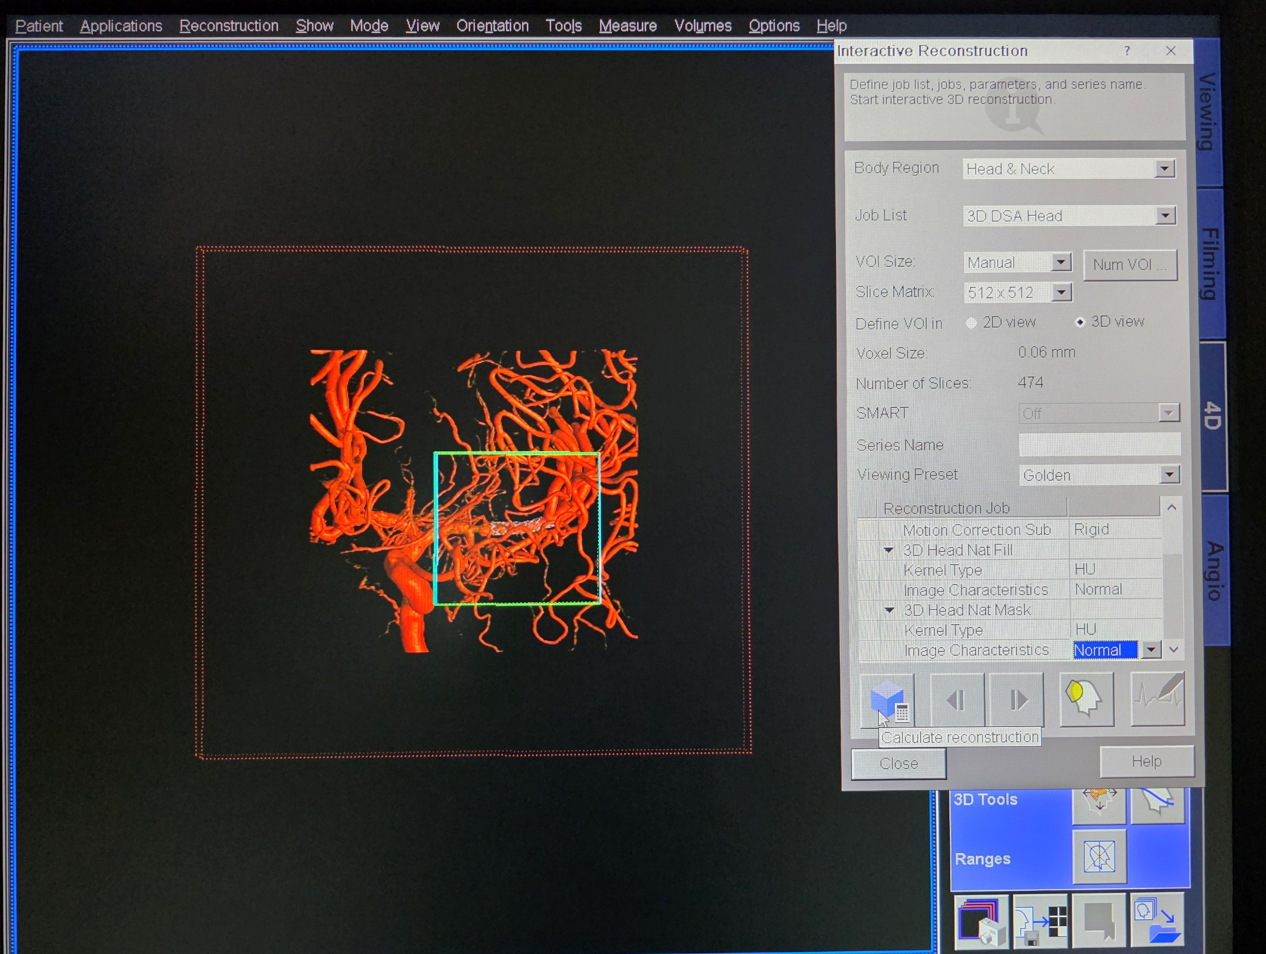
After the reconstruction, you have three new series with asterisks next to them – Sub* and Nat Mask* are displayed here.
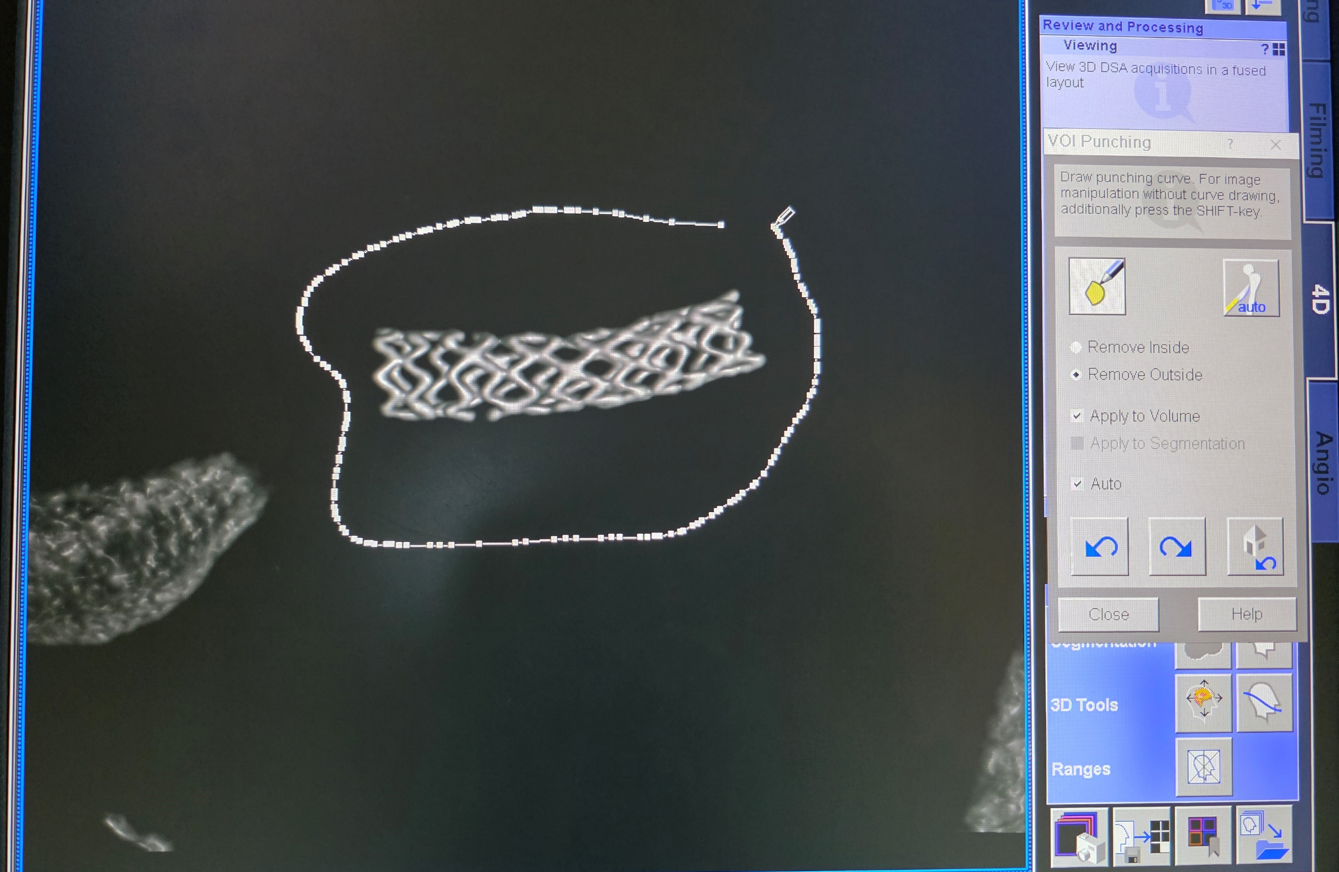
We unselect the “Sub” to only see “Nat Mask” — and use cutting tool to remove bone around stent

“VOI Punching” tool
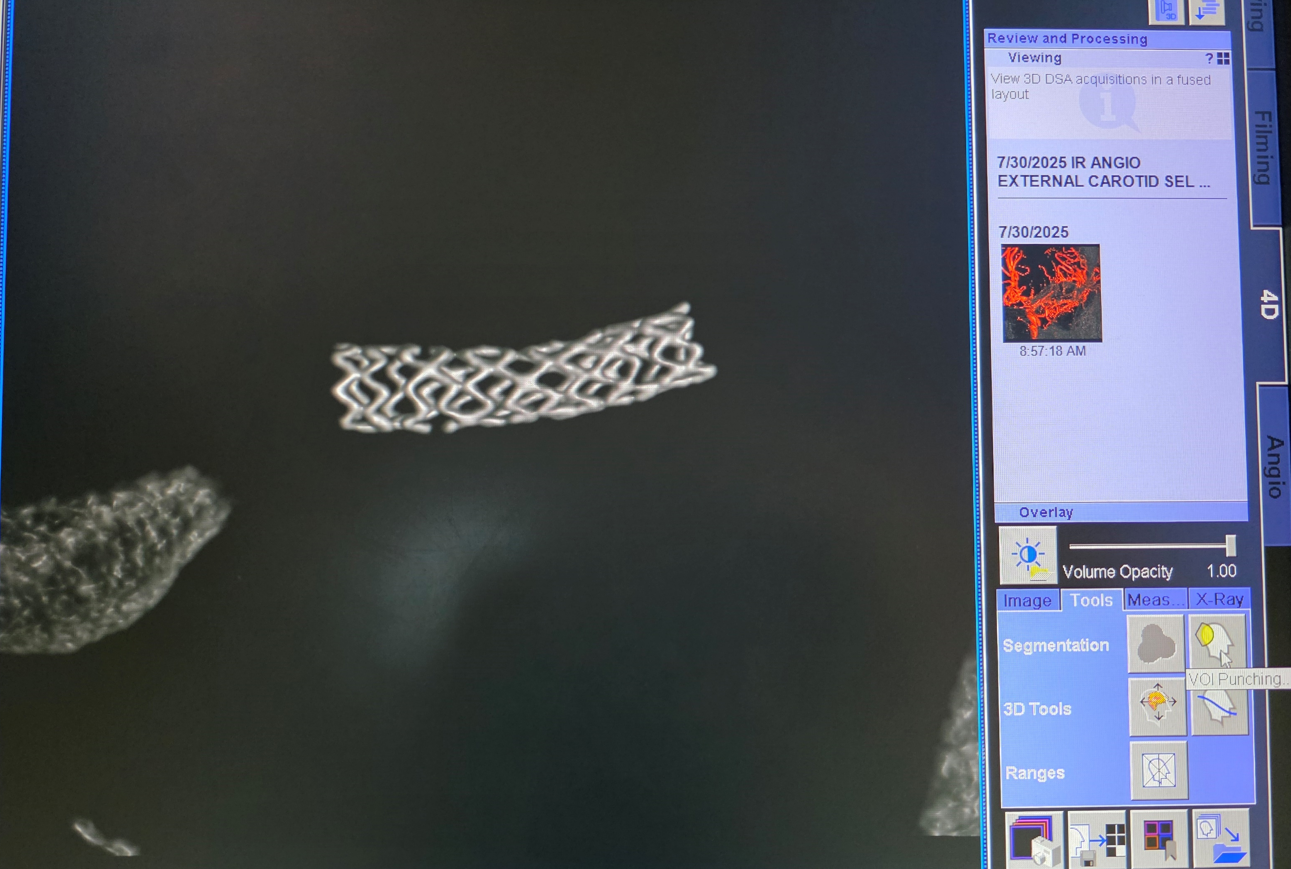
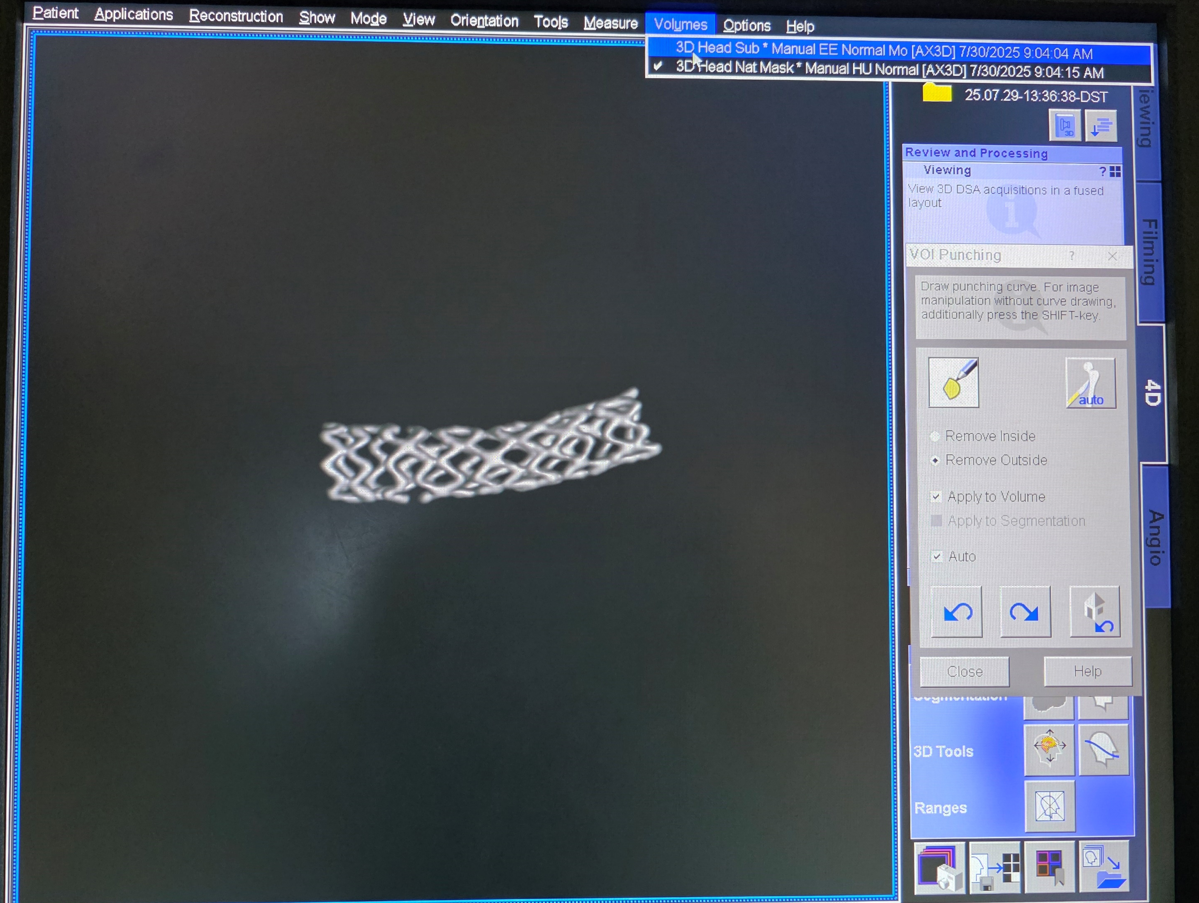
Cut away, make sure you know which is being removed — Remove Outside in this case
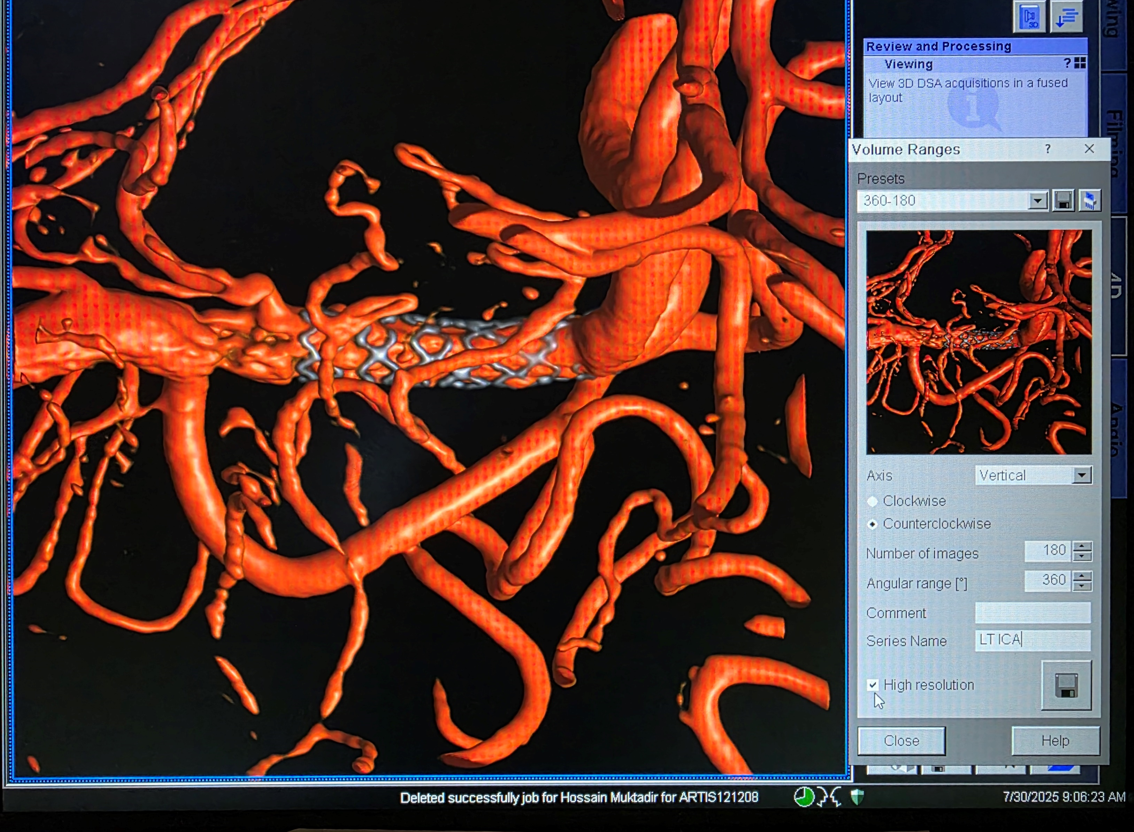
K. Now bring back Sub* under “Volumes”
Its better than the default, but not by a lot — much more difference can be achieved with secondary reconstructions of 10 and 20 sec injections, but that’s not what we are doing now.
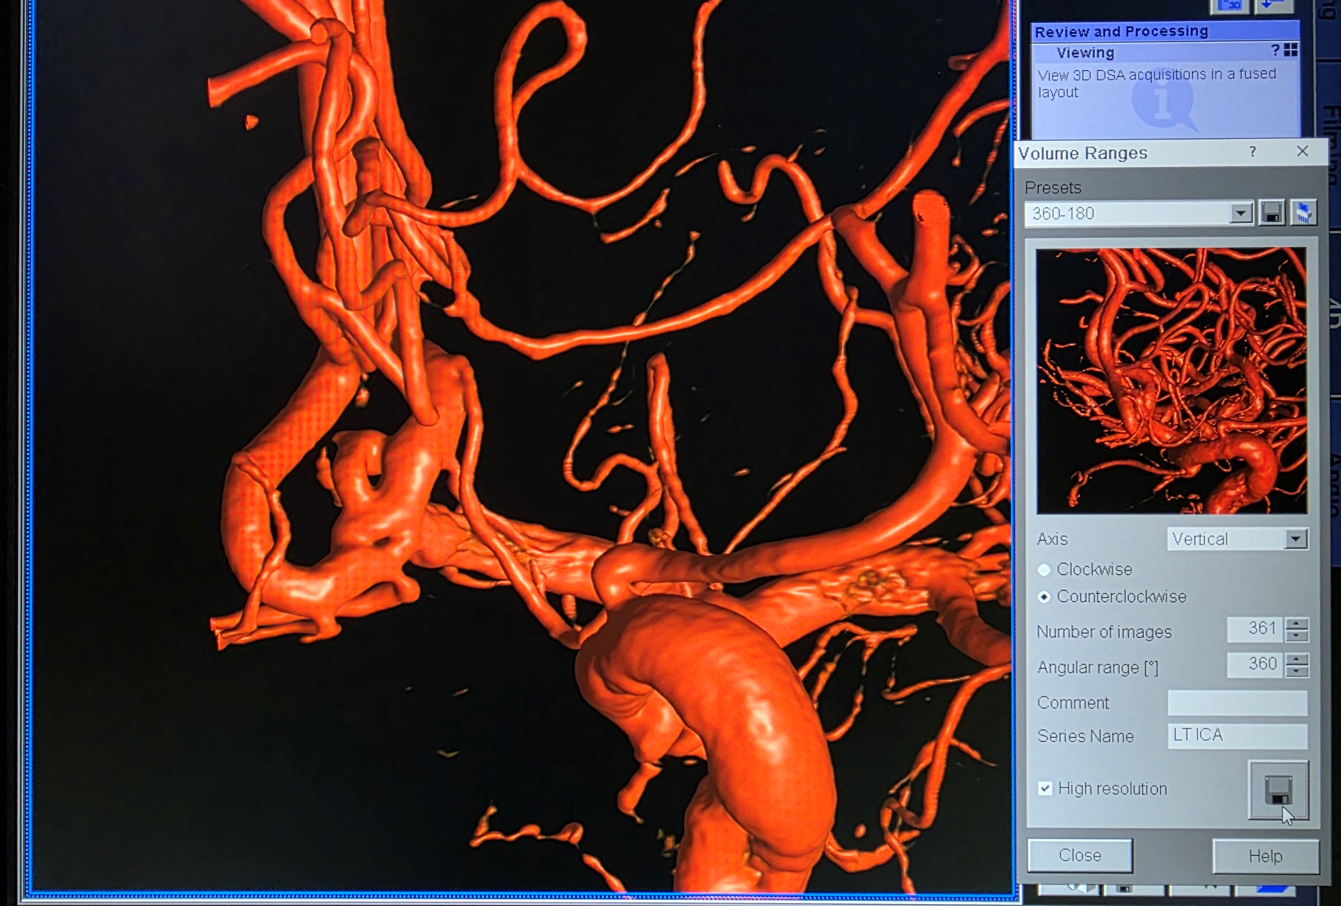
You can save rotational ranges — a series of rotational images — by choosing “Volume Ranges”. There are 180 images in a 360 angular range — meaning full circle around the stent with image every 2 degrees. Dont be stingy on having lots of images.
Make sure you know that axis is “vertical” or “horizontal” — around which axis does the image set rotate
The spin we made is below. Cutting away some branches would make it even better. Do that for us.
Double click on the Volume Rendered or VR image to see the orthogonal maximum intensity projection mages (MIPs). You can keep or remove reference lines, C-Arm, etc.
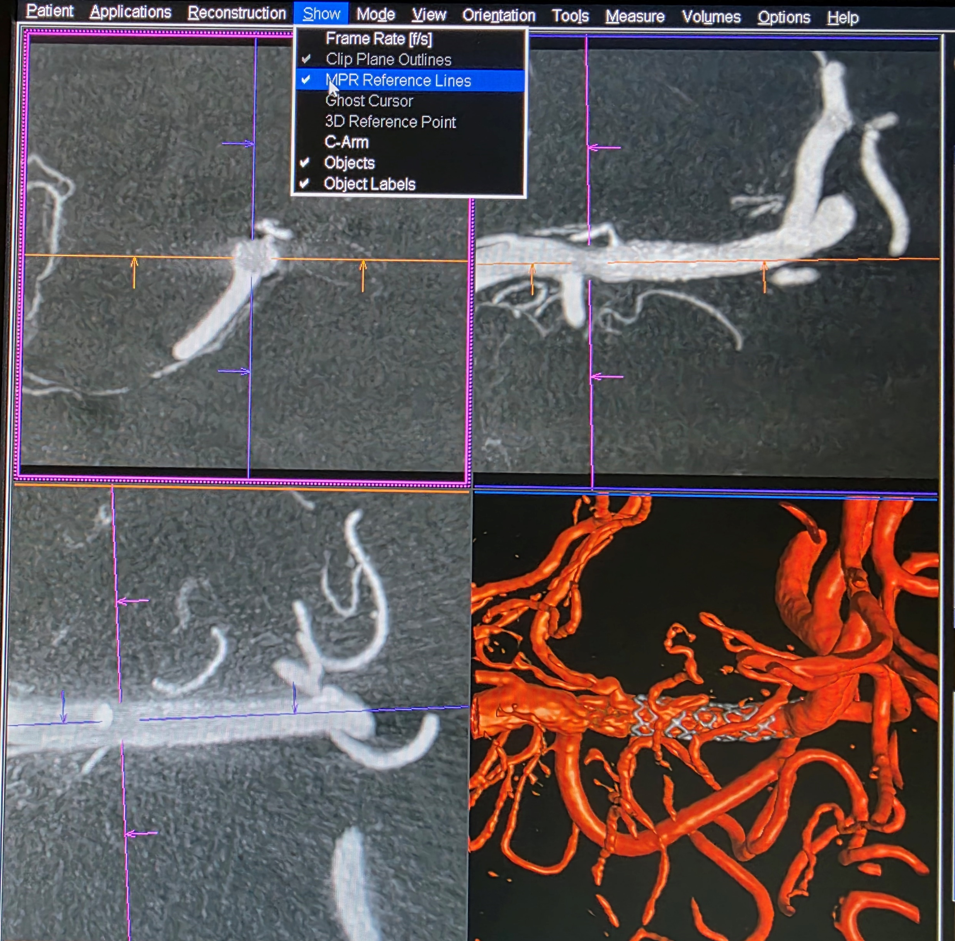
Increasing Slice Thickness under “Image” Tab produces various MIPs
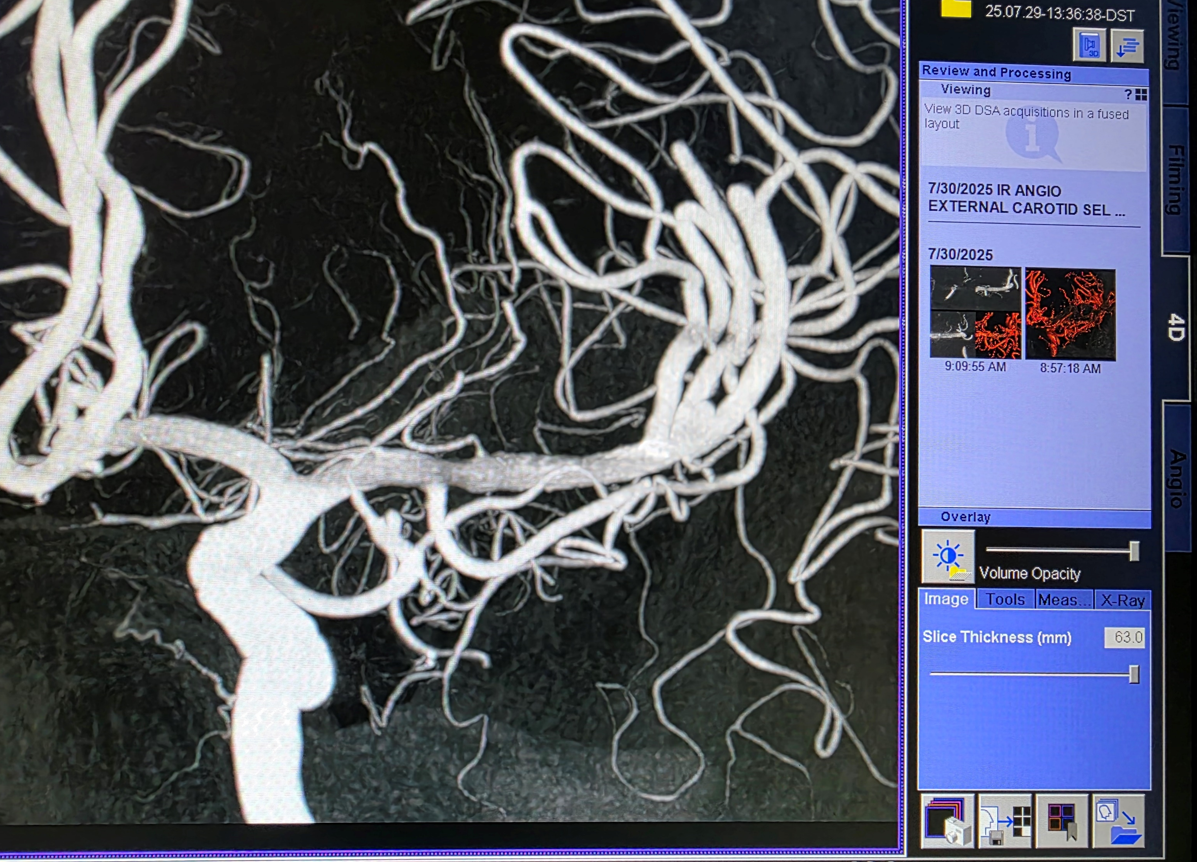
You can see two ACOM fenestrations and two Heubners. Not bad.
A subthalamic branch comes off one of the fenestrations
Spin — made with the parameters above — to see it