
Here we show how to maximize quality of a basic post Pipeline Dilute Contrast DYNA to check for wall apposition etc. We then show how to create a much cooler-looking SuperDYNA
Standard issue bilateral superior hypophyseal aneurysms. The left one was treated several years ago and is cured
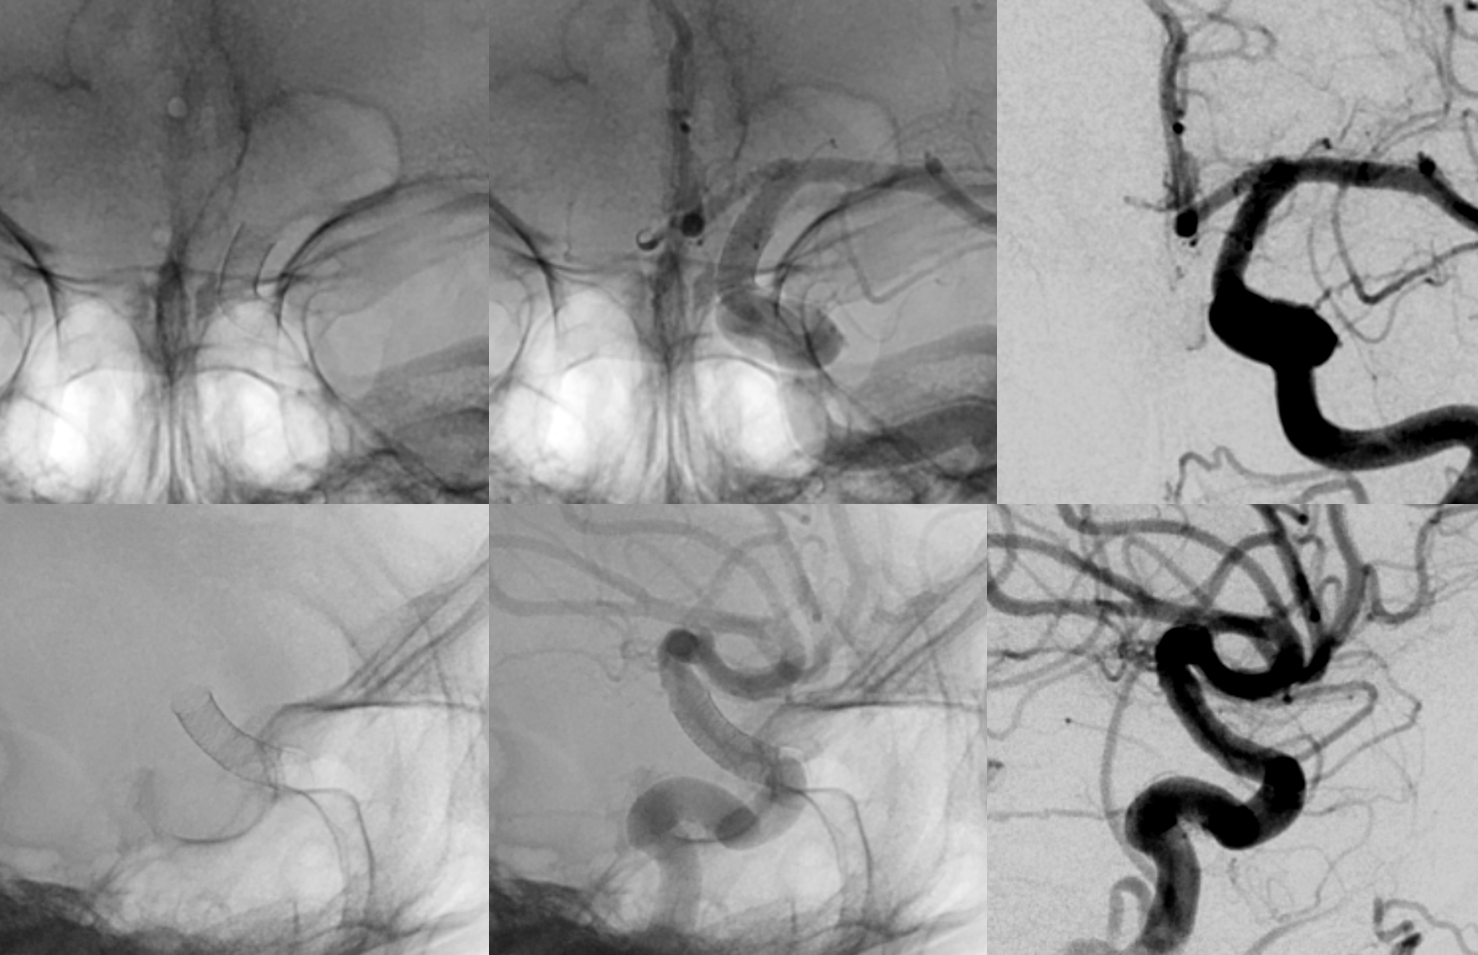
Right one is on for today


Now let’s do a post DYNA CT. FOr Siemens Q, the protocol is a 20 second long DYNA single phase (DCT), 22 cm FOV (no binning, “micro dyna). Placing the area of interest in the center of the screen makes a BIG BIG difference in quality. If you really want to see the device maximally well, do that.
Injection: 20% contrast dilution, 3.5 cc/sec for 77 ccs, 2 sec delay. The catheter should be positioned relatively low to allow for adequate mixing
This produces a standard reconstruction
However, we want a better reconstruction — smaller FOV, “sharp” characteristics. So we choose “Interactive”

Here is the result
Say you want to make this into a rotational dataset. Choose “volume ranges” — use 360 angular range and 360 number of images to have image saved every 1 degree. Don’t be stingy
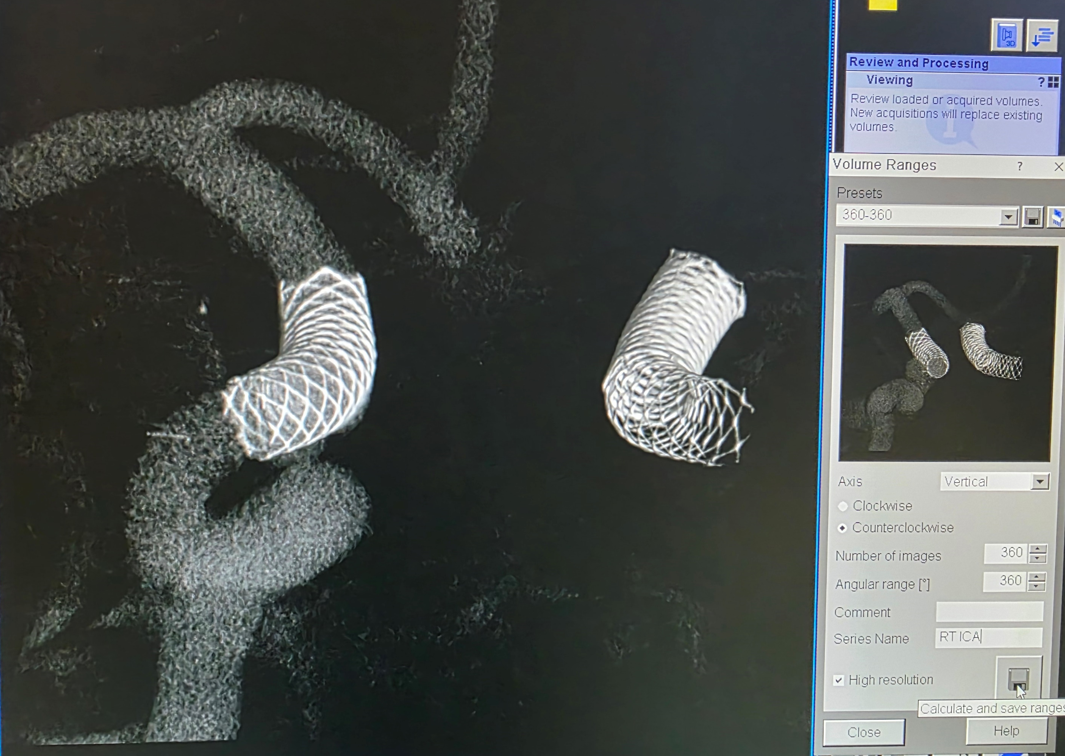
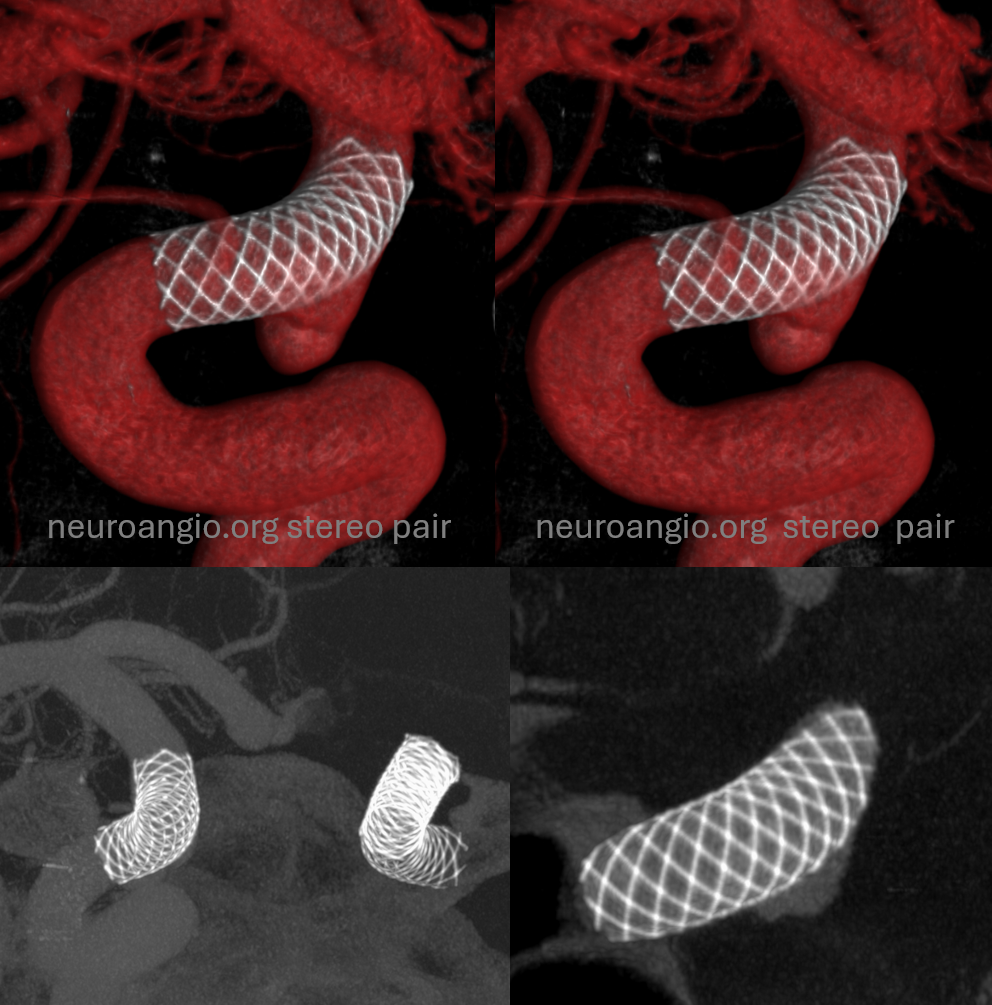
Here is the result
Double click to see MIPs. Examine them. This is what you get. SO MUCH BETTER!!! Just from this one simple step. Really, you can stop here — most of the needed information is available.
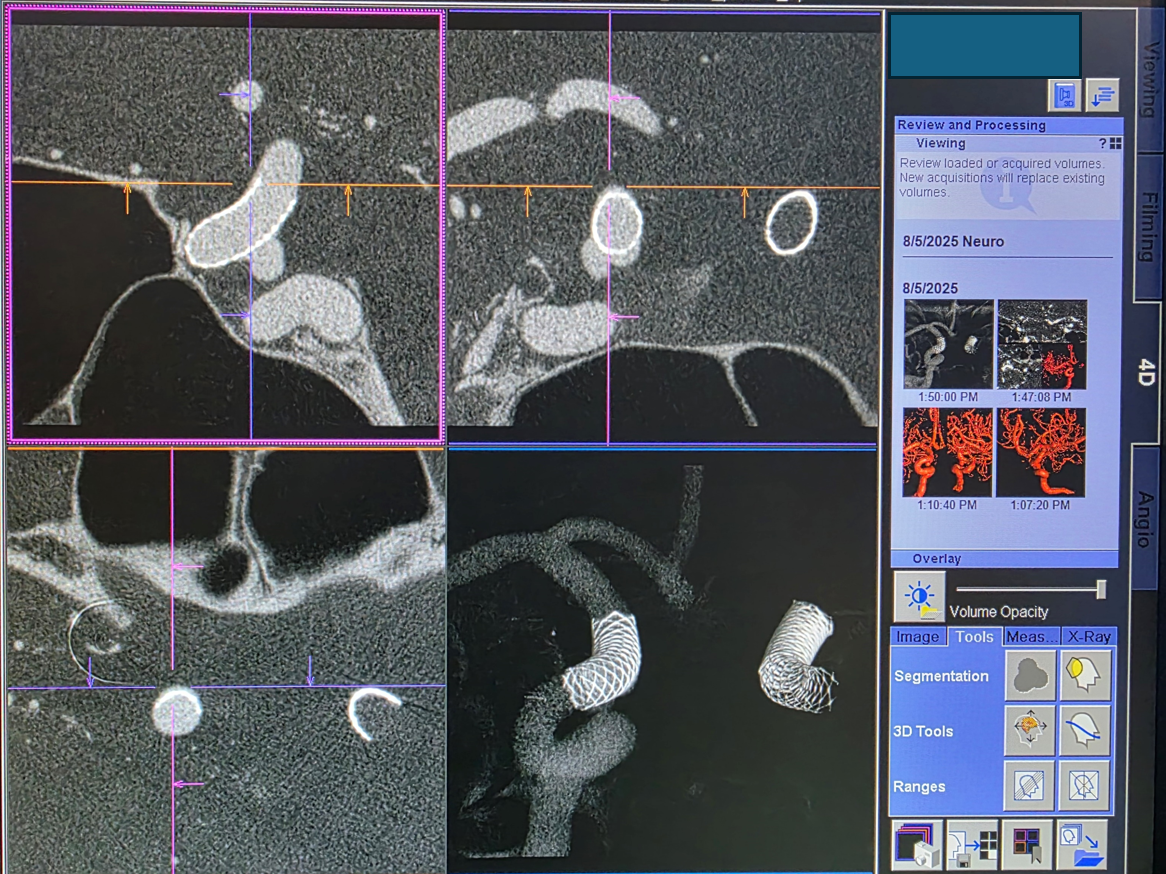
Parallel ranges — the MIP axial dataset. This is essentially all you need
You can see one platinum braid from the left side slightly inverted into the lumen in the crosshairs. This is not a problem as you can see from healing, but good to be aware of what sometimes happens
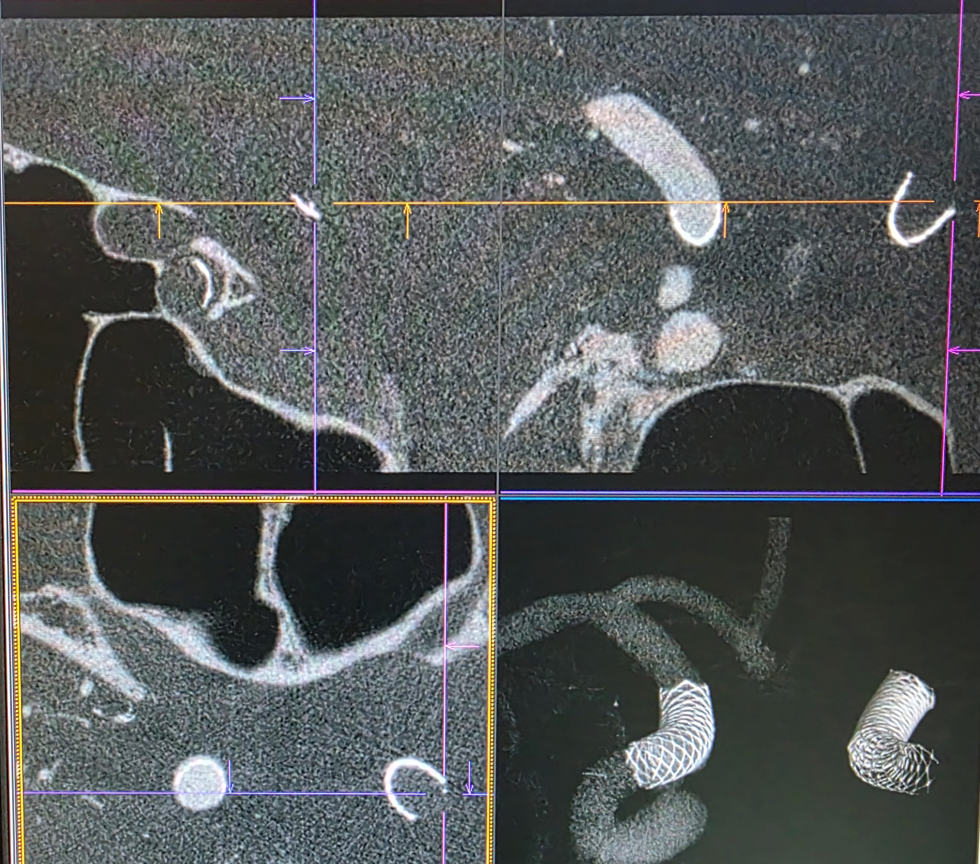
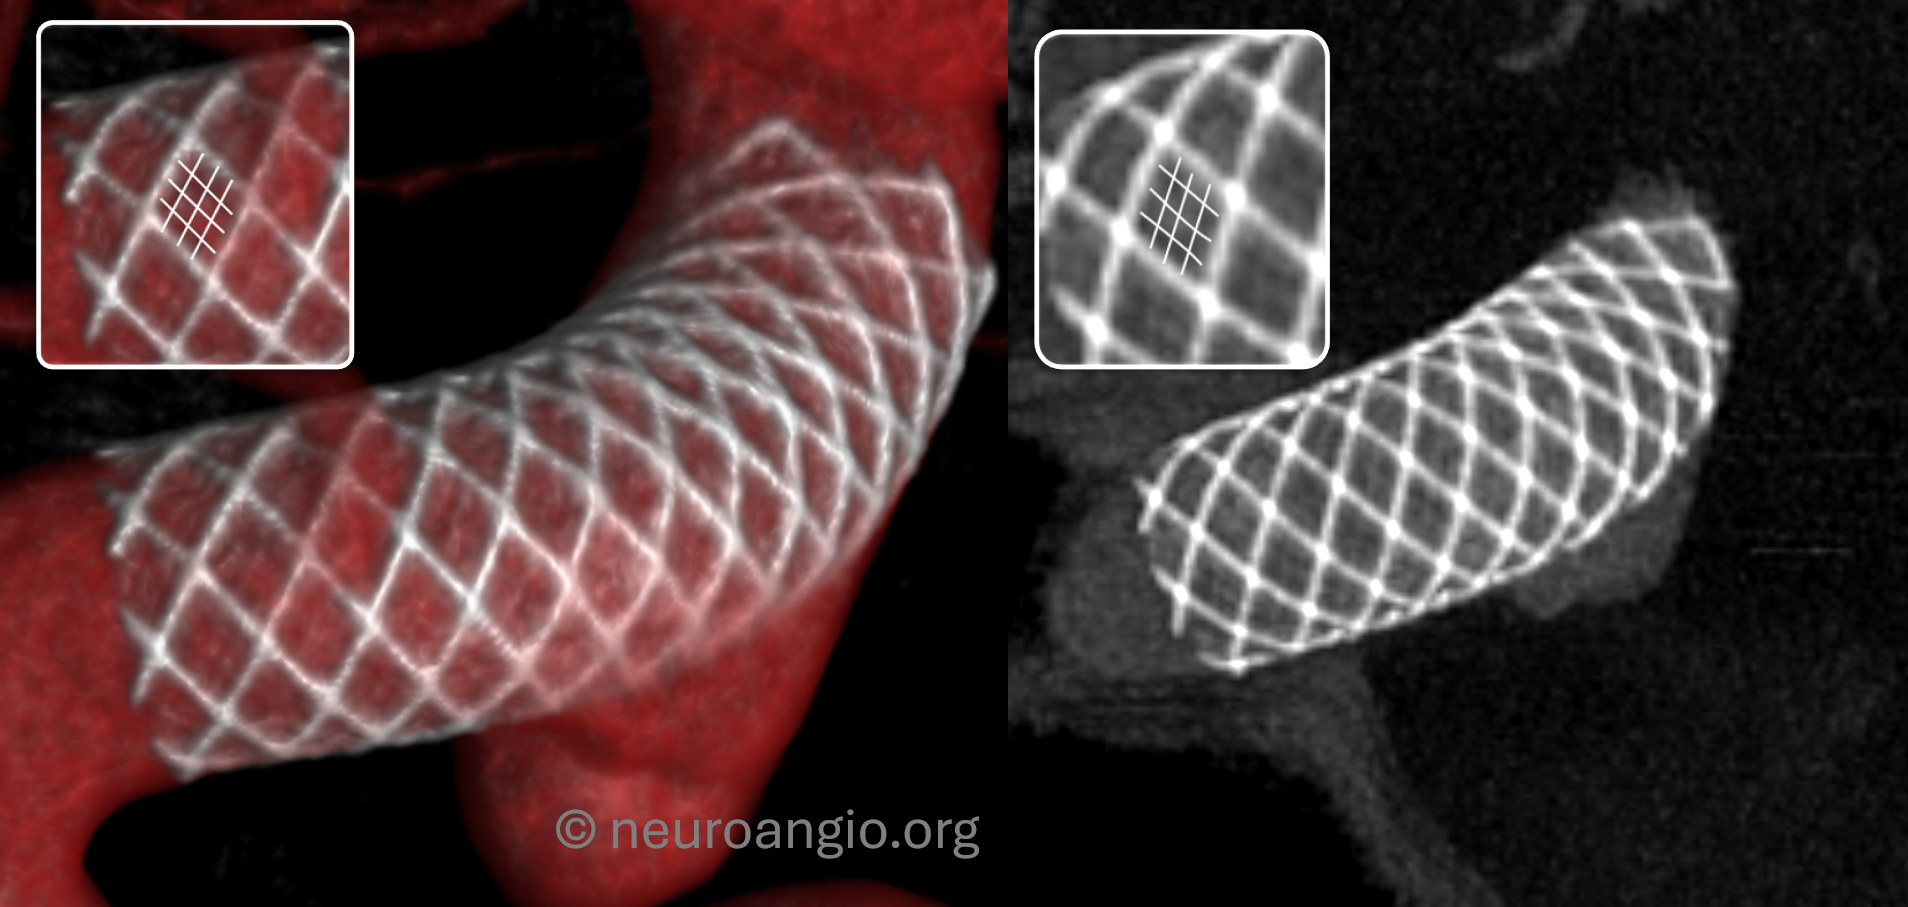
One test of you DYNA imaging quality is to look for faintly seen non-platinum Co-Cr braids of the Pipeline Shield. In the top quality images, you can begin to see them in some areas (drawn for clarity in the insets below). That’s truly amazing — to pick up a non-radiodense alloy like Co-Cr (got Ni there also and other things they don’t tell you about).
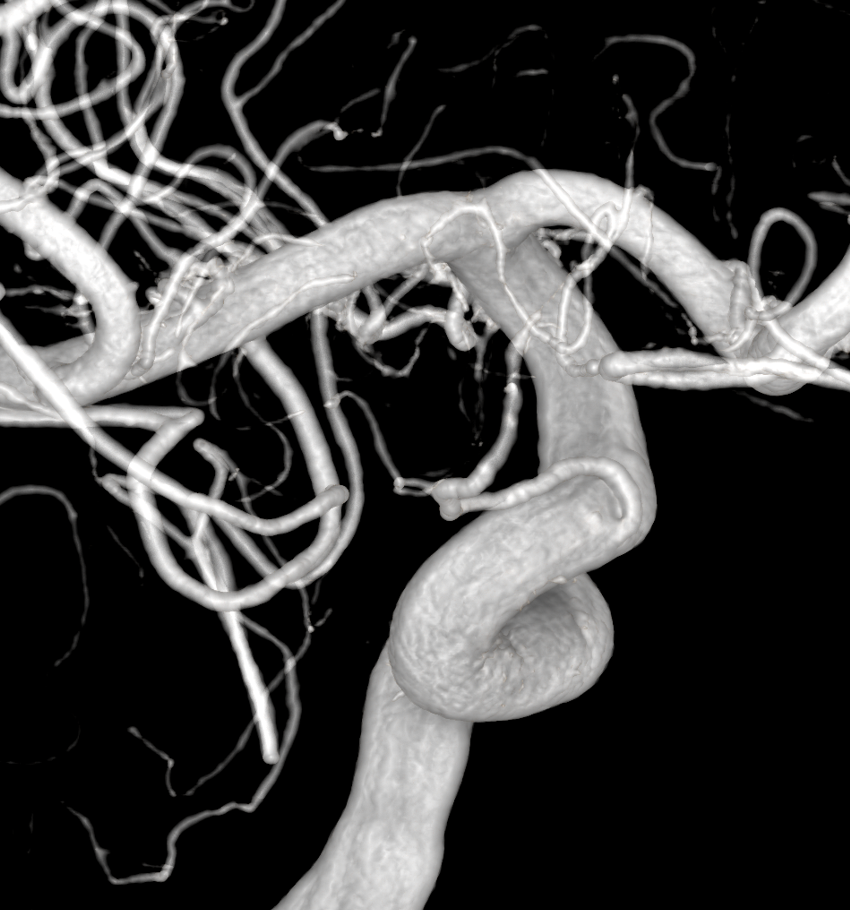
The image on the right is the one you just got. The one on the left is a “SUPERDYNA”. How to get that — see below
SUPERDYNA — ADVANCED VISUALIZATION BELOW
Say you want to do more than dilute contrast MIPs. For example, the volume rendered images do not come out well with dilute contrast. MIPS are excellent but VR is not good. What to do? You can do a 10 second DSA DCT dual volume post-treatment DYNA. Certainly that’s good. Another way is to combine the pre-treatment DYNA with a post-treatment one — the SUPERDYNA.
Before treatment, we obtained a 10 second DSA DCT (dual spin) 22 cm FOV (no binning “micro DYNA”) with undiluted contrast. Injection 3.5cc/sec for 42 cc, 2 sec delay. We prefer 10 second DYNA to the usual 5 second “3D-DSA” — the quality is much better and radiation is not that much more.
Mask
Fill
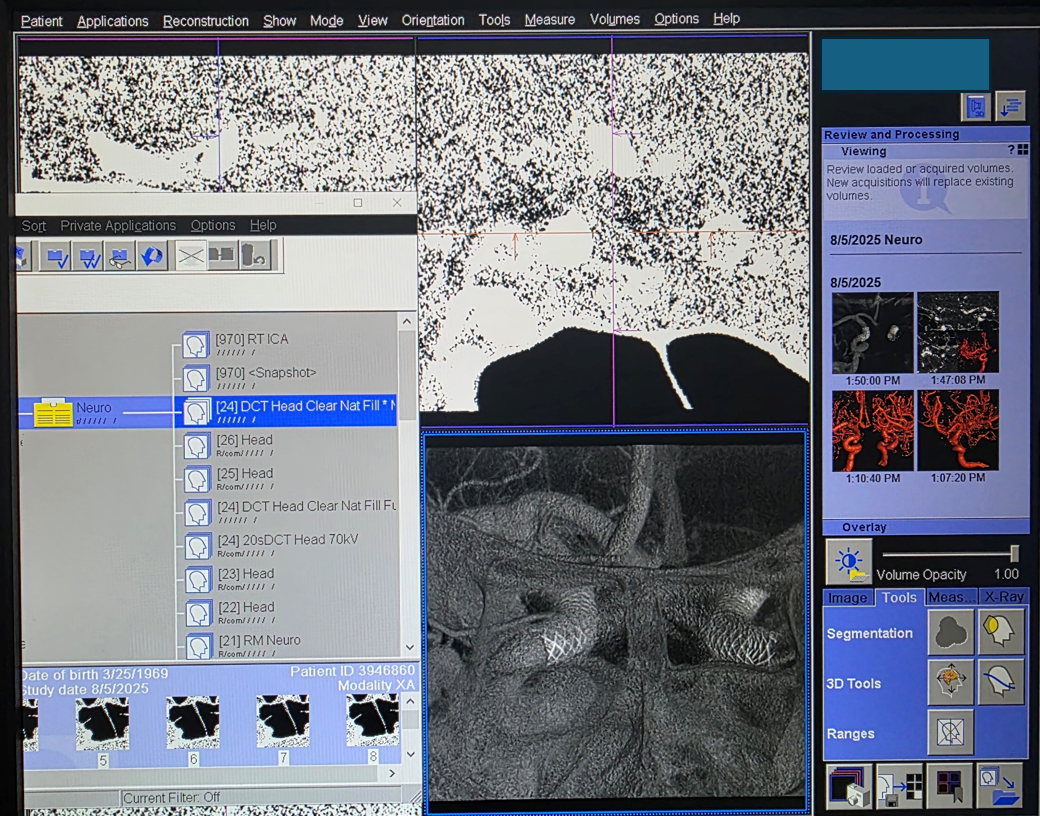
This yielded a standard reconstruction
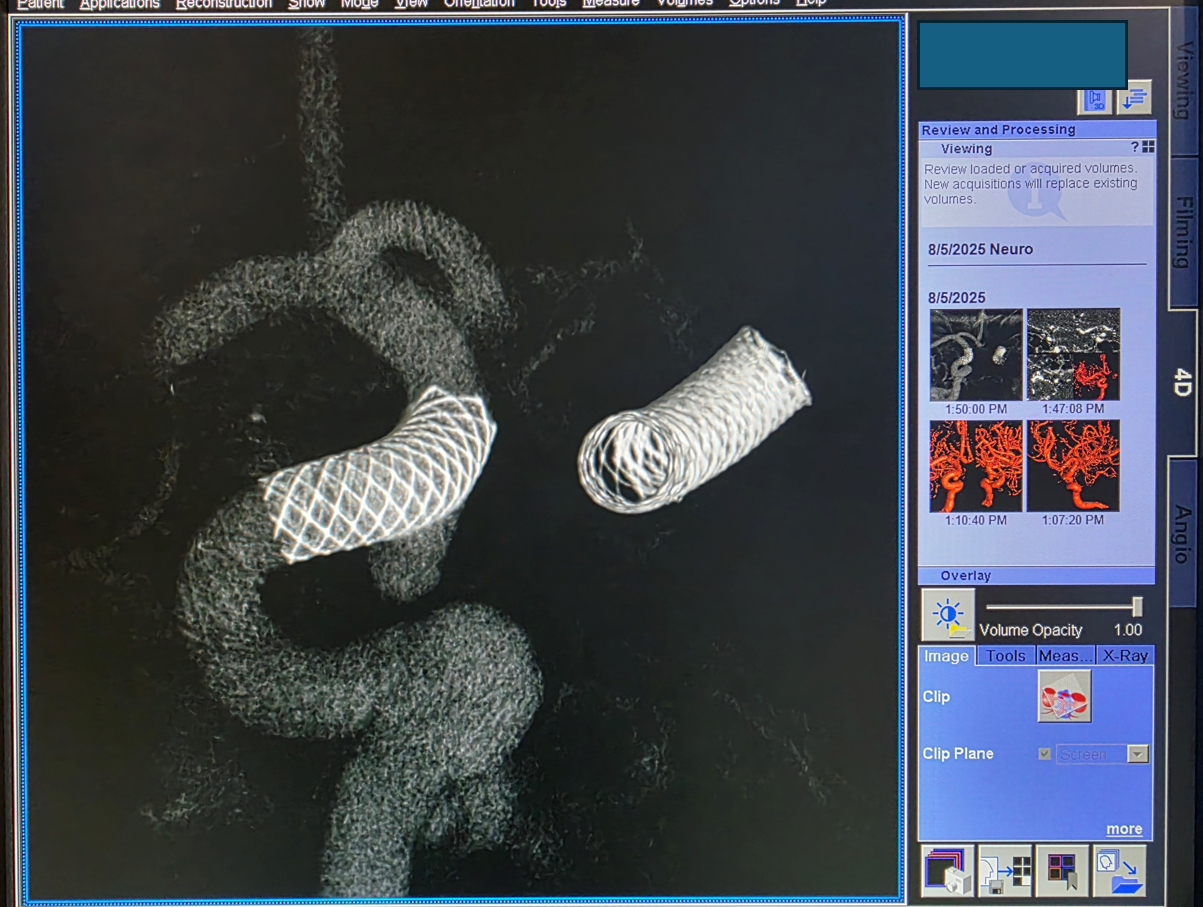
We now load this dataset to superimpose it on the dilute contrast secondary reconstruction DYNA we already have.

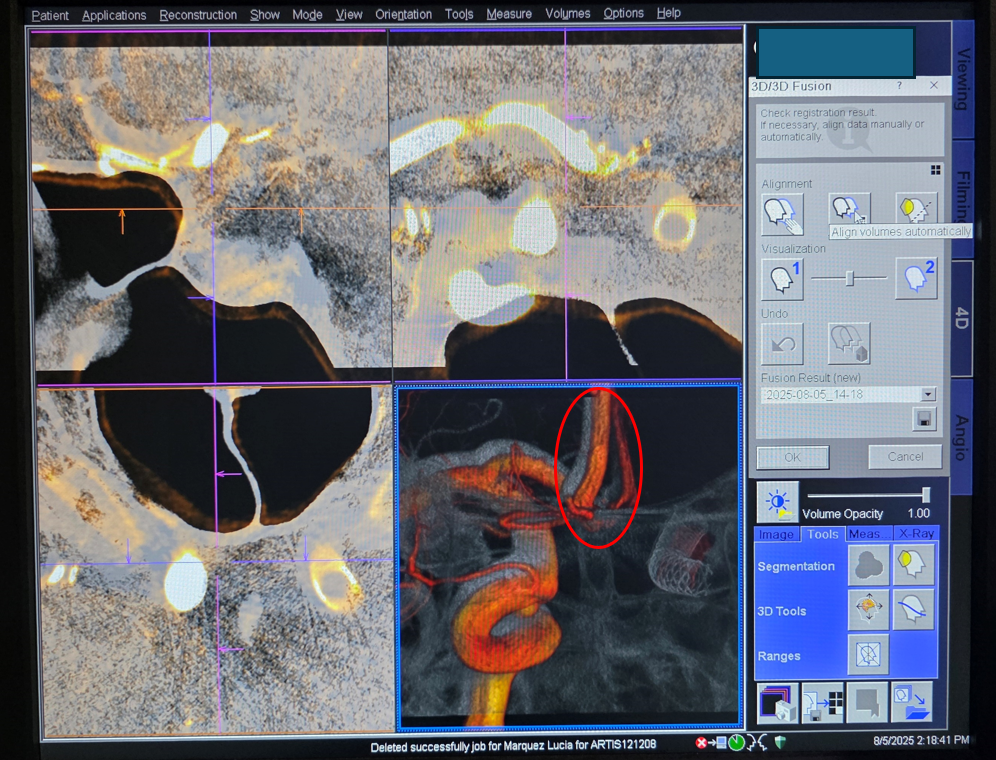
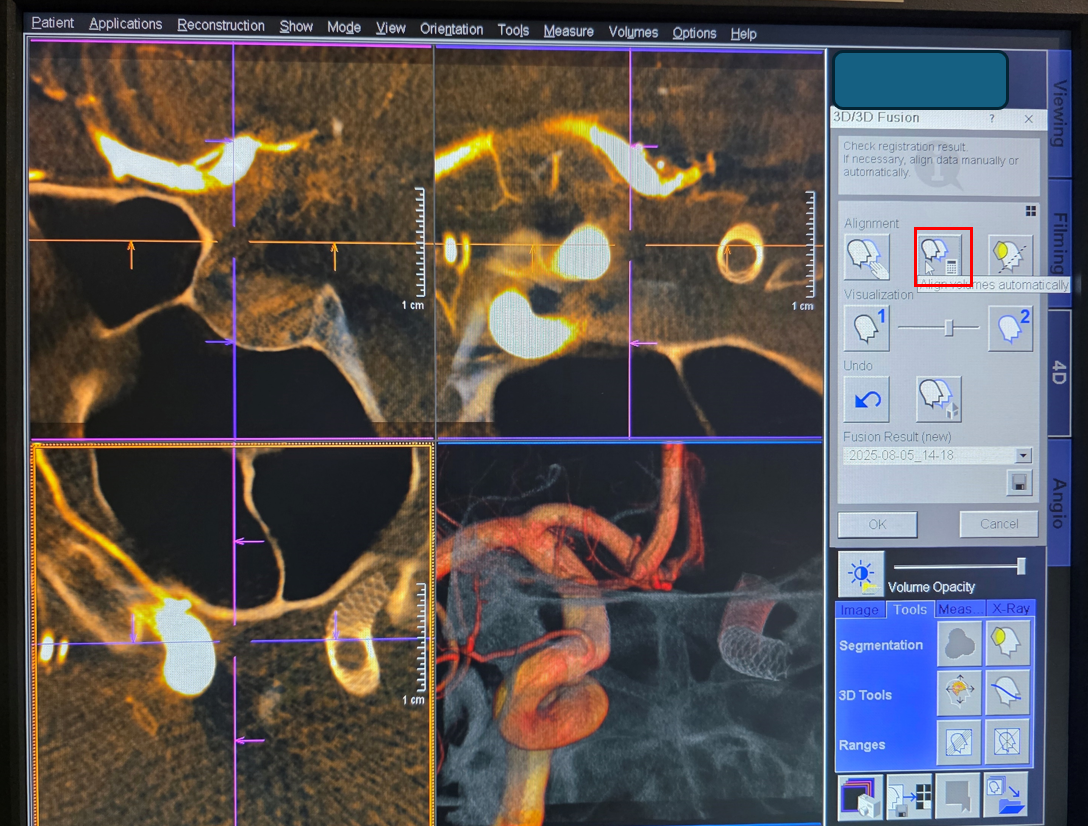
The alignment is off (red oval). Click “Automatic Alignment” and see if this works. It usually does in the Q and almost never in the ICONO
Didntt work — made it totally off.
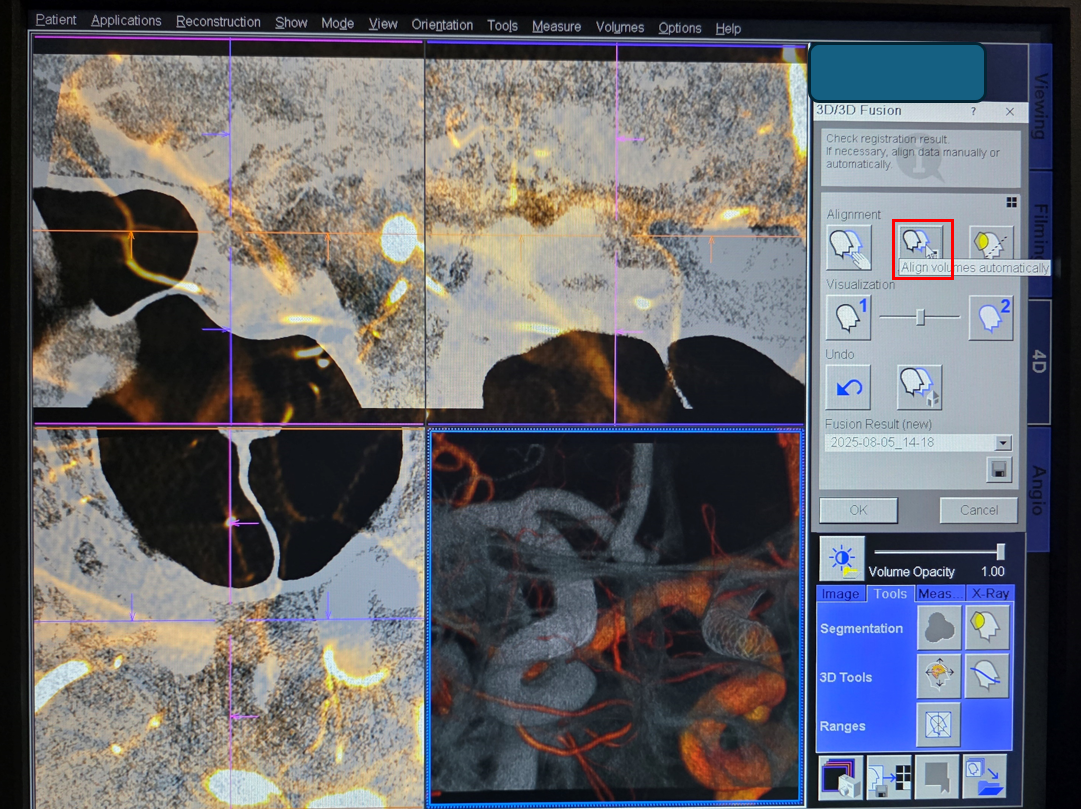
Undo the automatic alignment (red square) and choose “manual alignment (red circle).
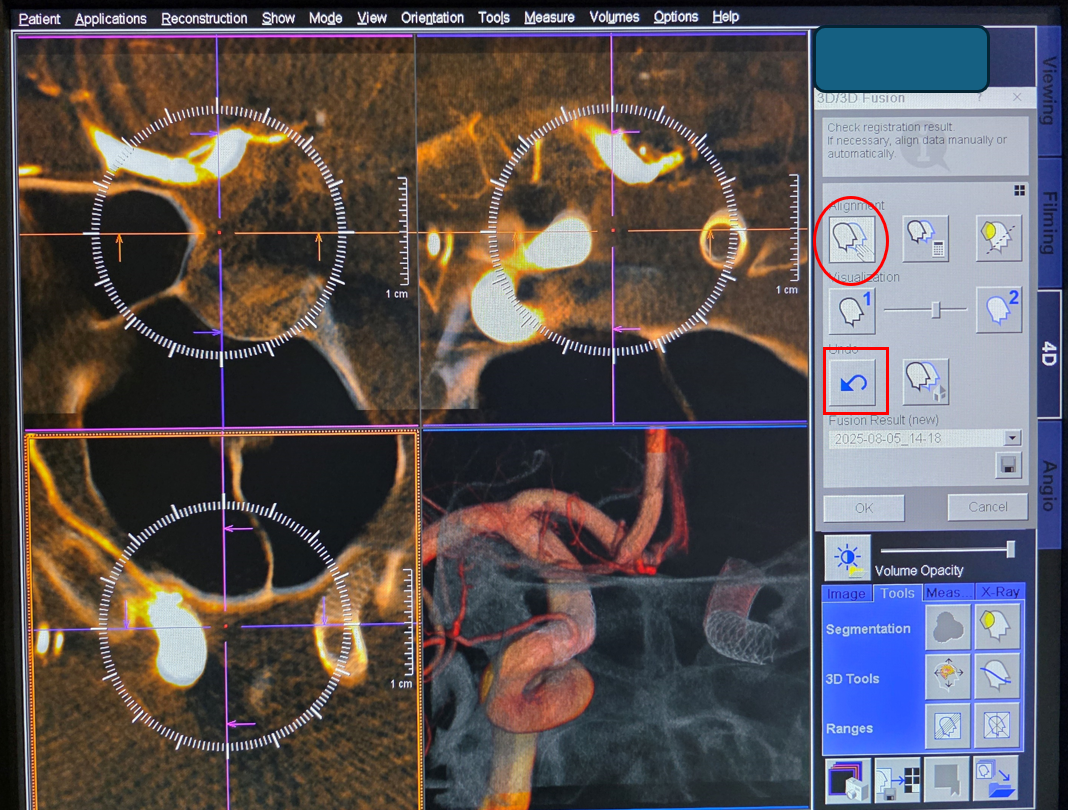
One manually aligned almost exactly, hit “automatic alignment” again and see if it works now. Again, this usually works in the Q and pretty much never in Icono. Latest is not greatest.
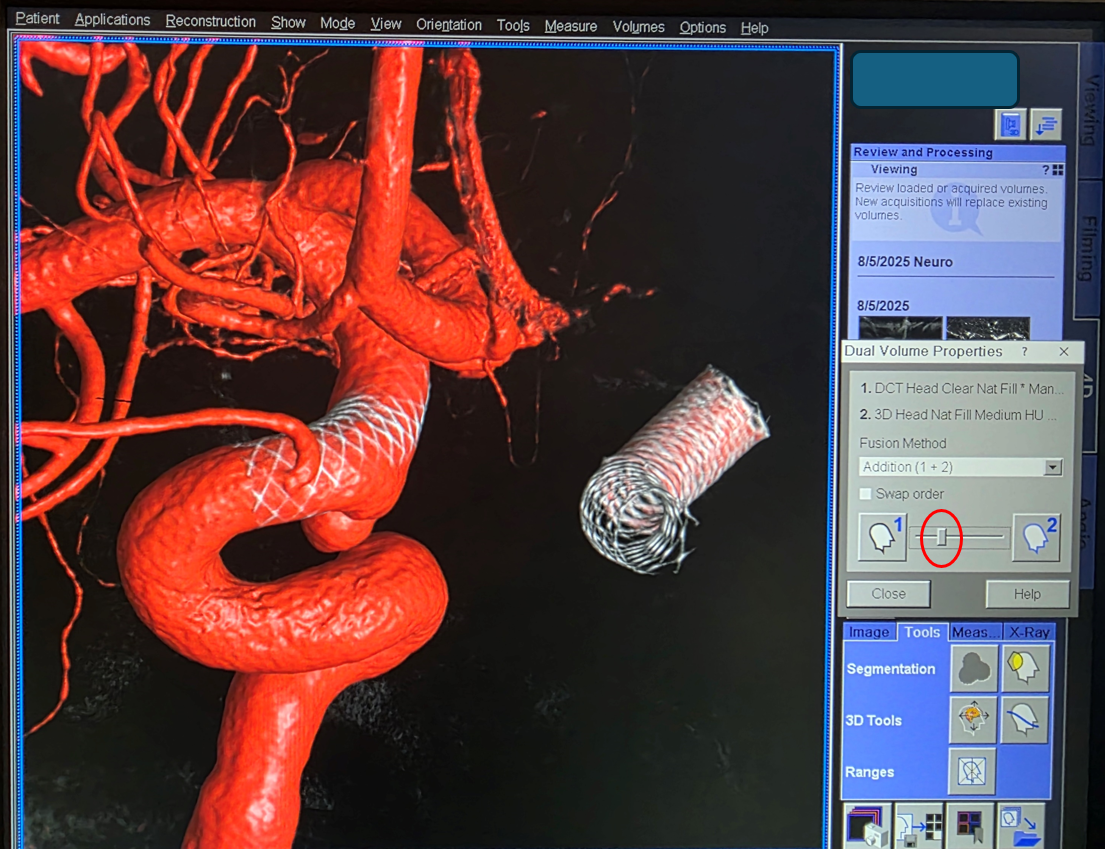
It worked. Now move the fusion bar to blend the volumes differentially until you are happy
That’s it. Now create a “volume ranges” superdyna spin you saw at the top of the page
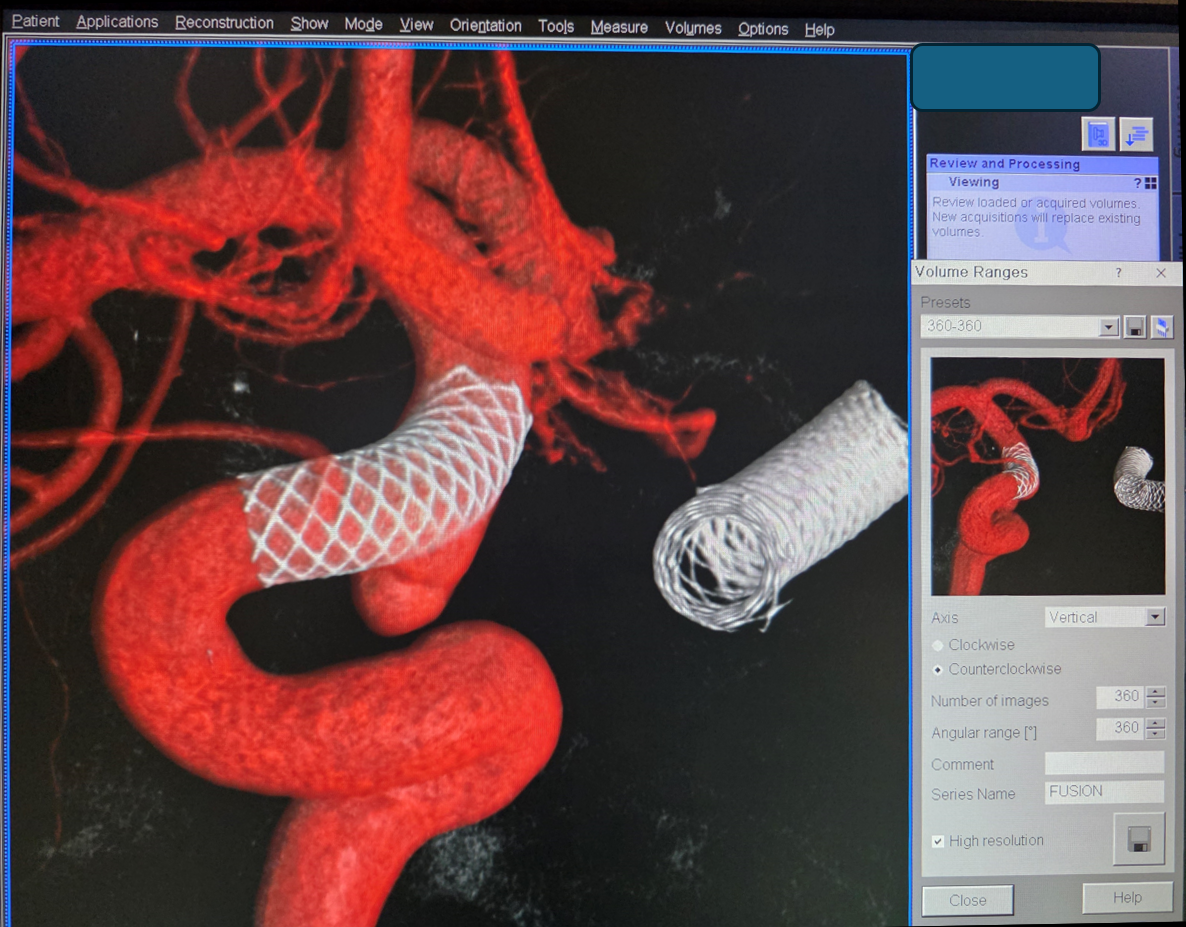
Here it is. Nice, right?