
Simple. Use GA, pharmacologic paralysis, and apnea. Choose the longest scan with highest spatial resolution. If you have “micro” non-binning protocol that’s the one. PLACE THE WEB IN THE EXACT CENTER OF THE DETECTOR! Makes a big difference. For simple reliable results use 20% contrast dilution with a few seconds delay to fill the territory. Do “secondary” reconstruction in “sharp visualization” mode. That’s it. If you have 70 kEv or 120 kEv modes, the differences are very minor, but 120 is a touch better.
For optional prettier results can use “SUPERDYNA” but it is more work and registration needs to be perfect…
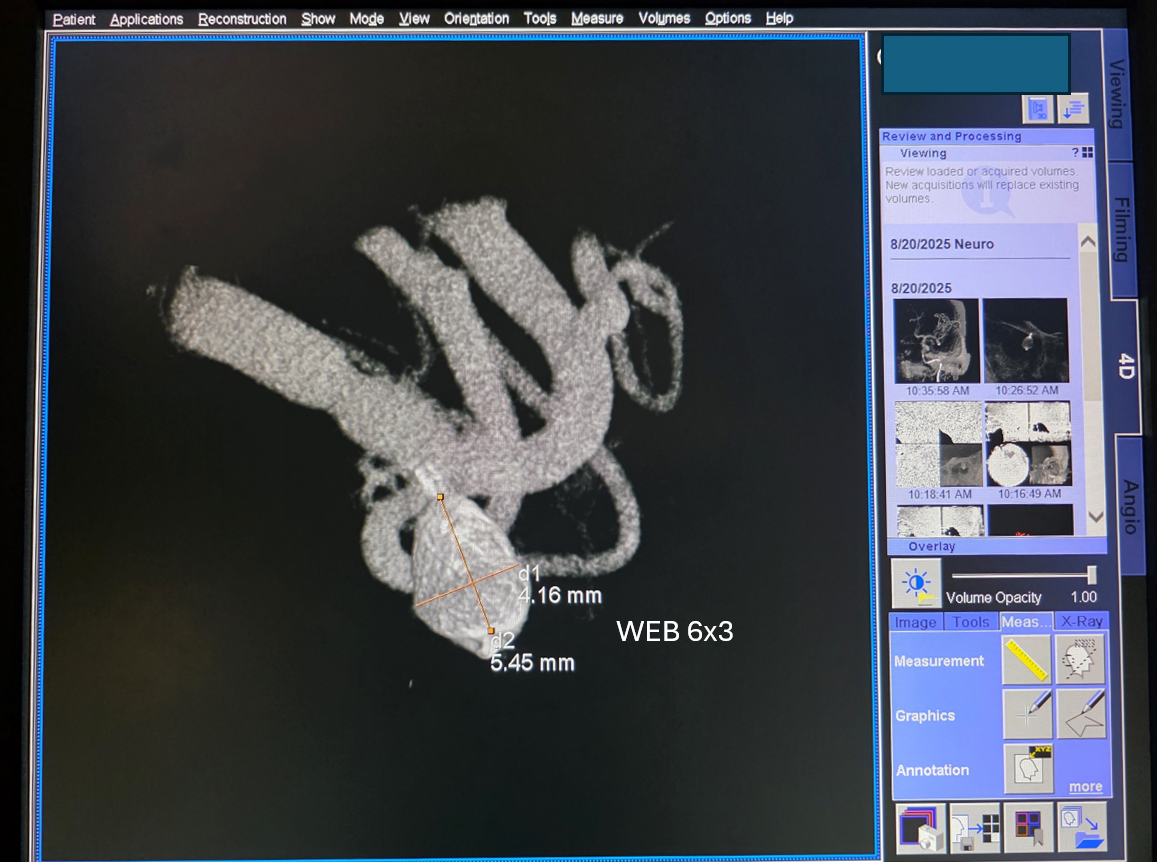
Here is a standard issue ruptured aneurysm, measuring 4.2×5.5 mm, treated with a 6×3 WEB. Superdyna is bottom left, 20% dilution DYNA is bottom center and right. Both tell you what you need to know.

Below is a simple 20% contrast dilution DYNA. Its a 20 second 109KeV “DCT” 22 cm FOV non-binned “micro”. Note how the WEB is exactly in middle of detector
Get this. Its already good enough.

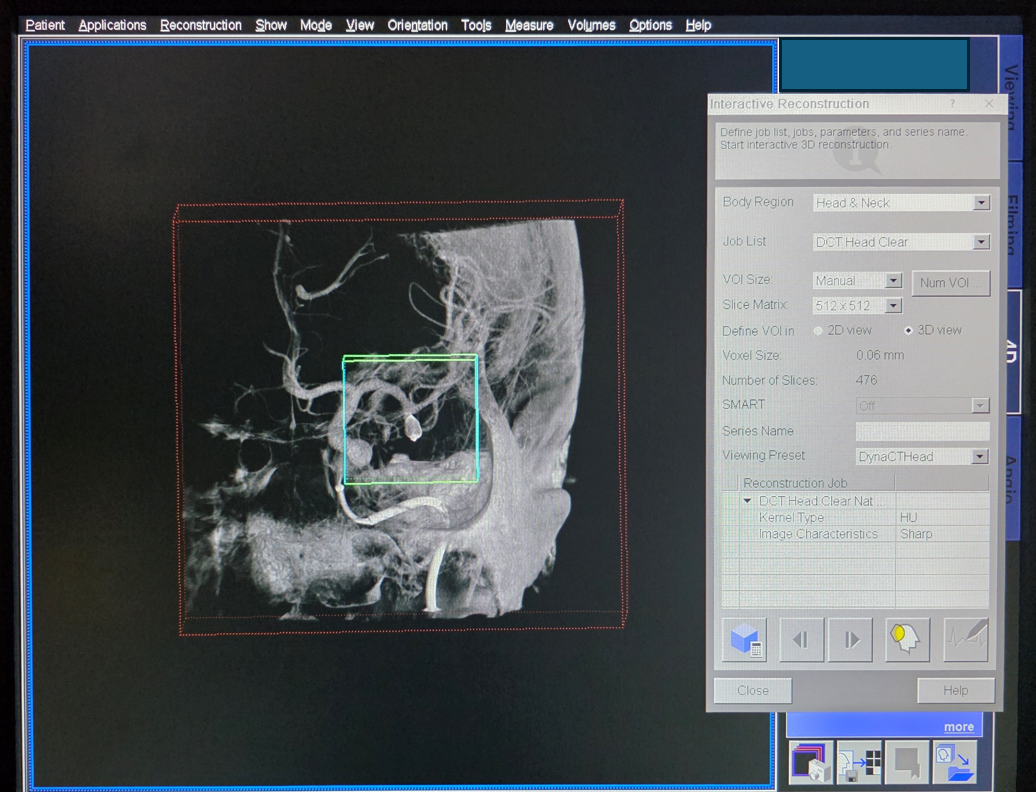
To do better, do “Interactive Reconstruction”, choose some cube with small voxel size (here it is 0.06 mm), and make image characteristics “sharp”
Thats it
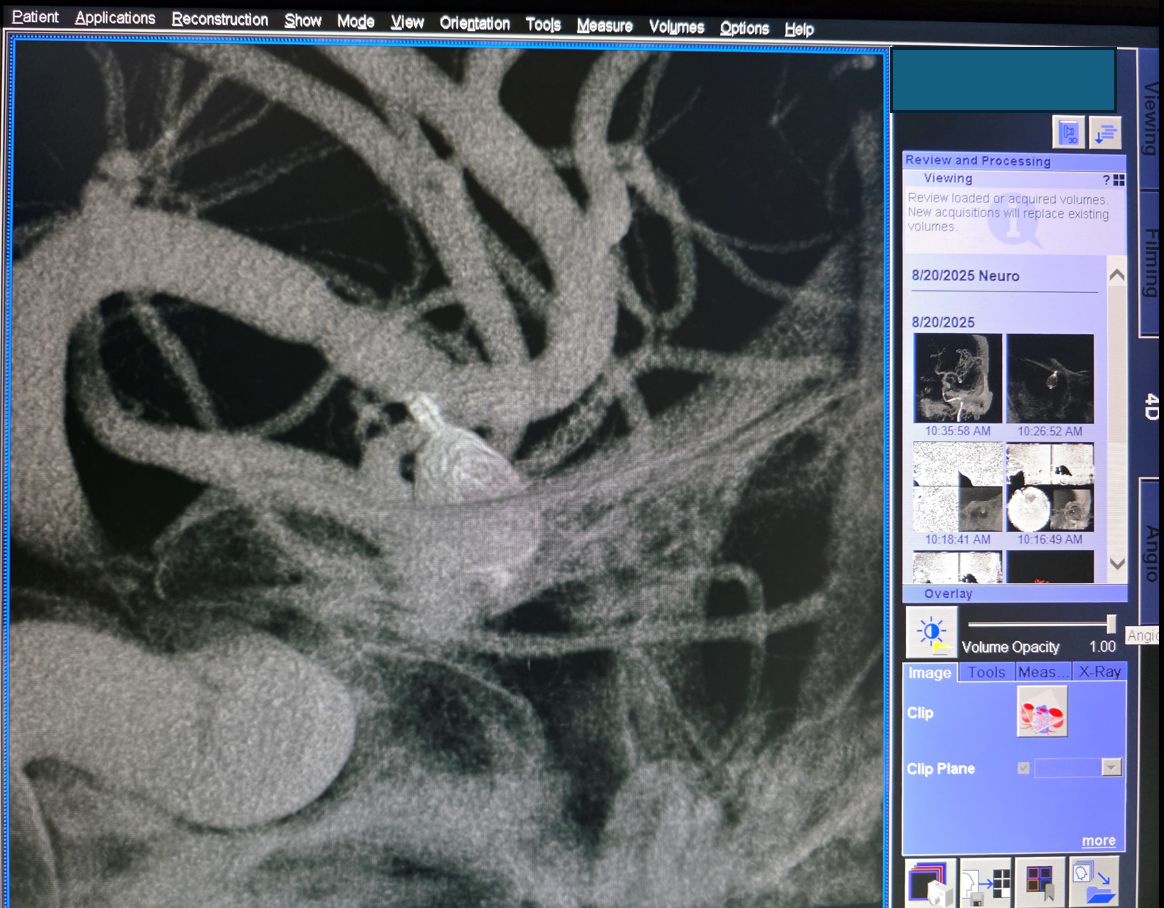
View from back
Make “Volume Ranges”ranges” to create a rotational video. Forgot to take image of this, but there are many examples elsewhere in the How To Do It section and at the end of this page when we discuss making SuperDYNA.
See how you can discern individual braids with more Pt than others. That’s how you know its good quality imaging.
Now, lets take it a bit further with a SuperDYNA. Lets say you want to figure out, on our machine, what is the best protocol. Below is a dry DYNA of the same WEB — 20 second DCT, non-binned 22 cm FOV “micro”, 109 kEv. Centered. Apnea and paralysis GA
Get this. Choose Interactive Reconstruction

As usual. Small voxel, sharp image characteristics

Get this

Compare this with the same acquisition done at 70 kEv. You can judge visualization by seeing individual braid with differing amounts of Platinum. Slightly better in 120 kEv

Now, lets say you want to use this dataset to create a “superDYNA” — fusion of a pre-treatment dataset done with 100% contrast and this one.
Choose the prior dataset — a 5 second “3d-DSA” 22 cm FOV non-binned version. Injection 3 cc/sec for 21 ccs, 2 second delay. Choose “Nat Fill” natural fill rather than subtraction dataset. Its better quality usually.

Load fused

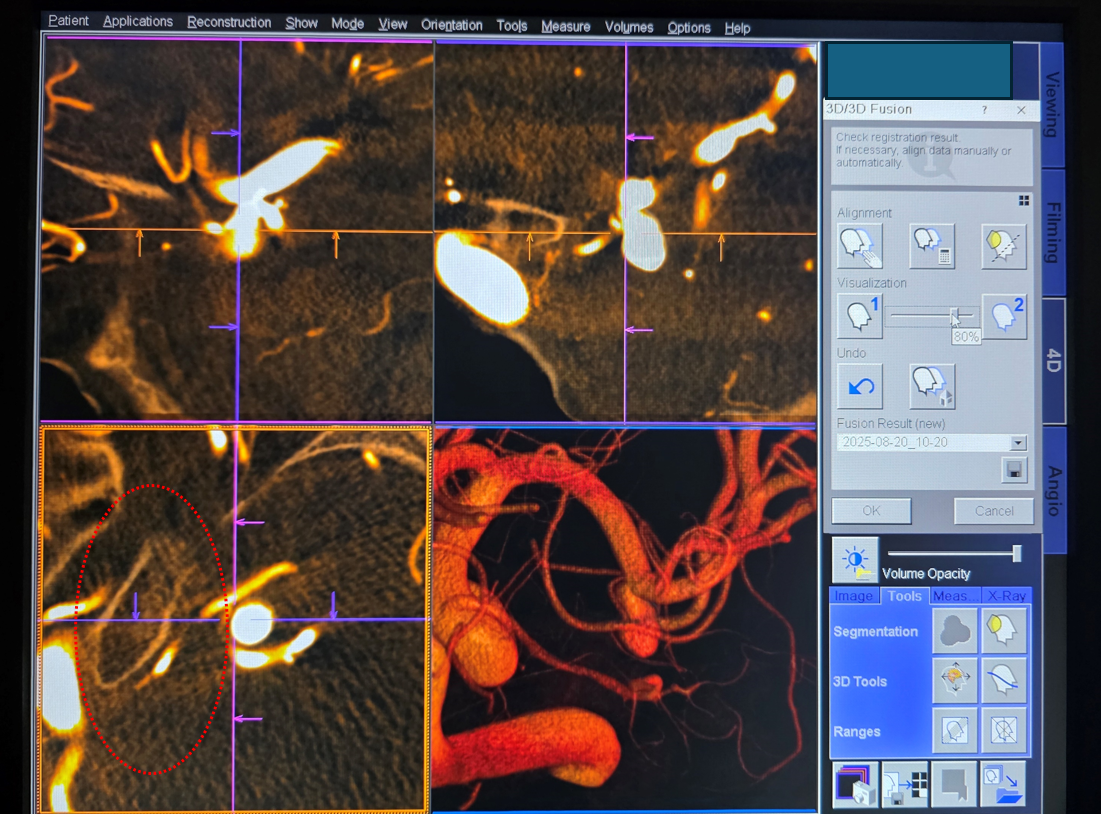
There is bone in both datasets, which is needed for co-registration. Try “Automatic Alignment” first

Looks like it worked. Move the “Visualization” bar to left and right to change blending of datasets and check to make sure osseous structures are aligned

Same to other side — 80% dataset 1, 20% dataset 2. Bones still aligned (red oval)
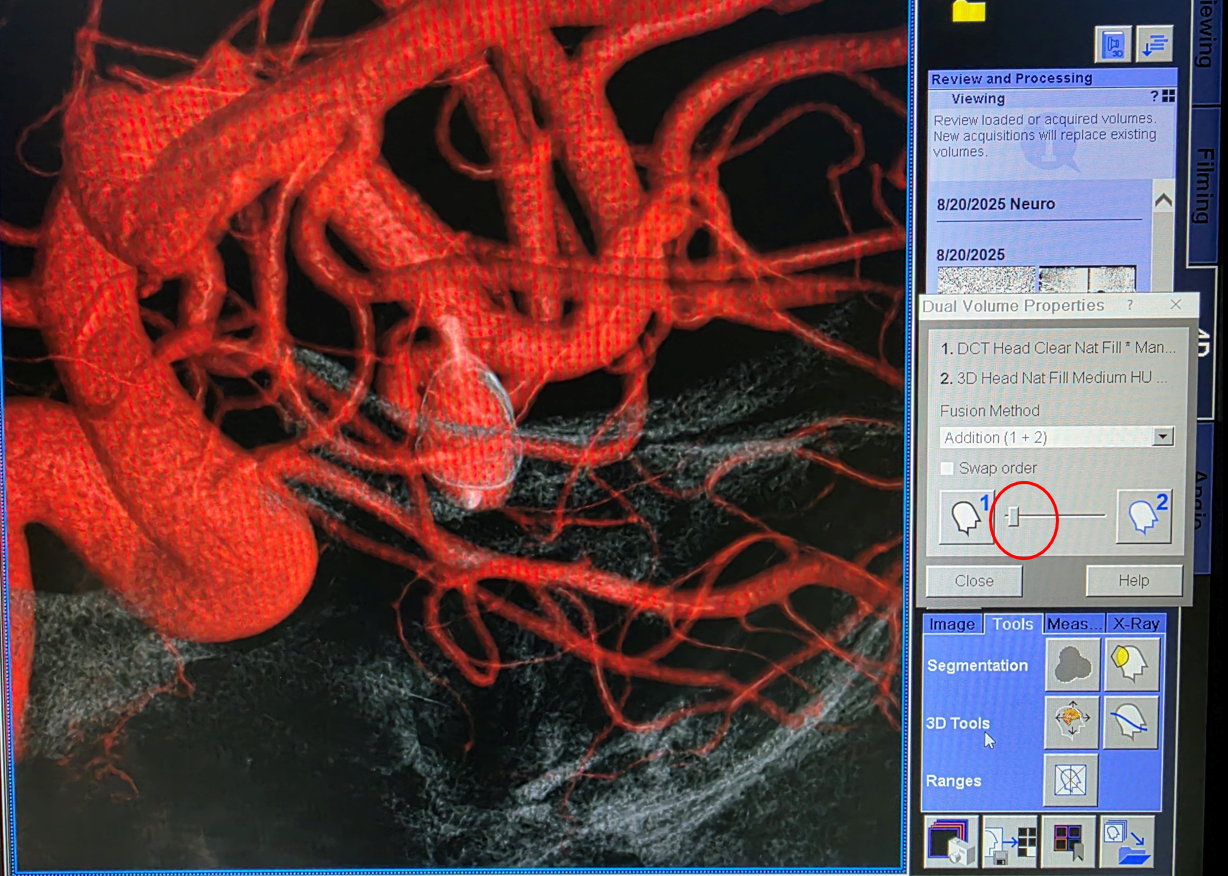
Hit OK. Looks good. Now choose Dual Volume Properties and again change % blending between datasets to make optimal image

Like below
Now make “Volume Ranges” — we use 360 Angular Range and 360 images to generate an image every 1 degree. Don’t be stingy.
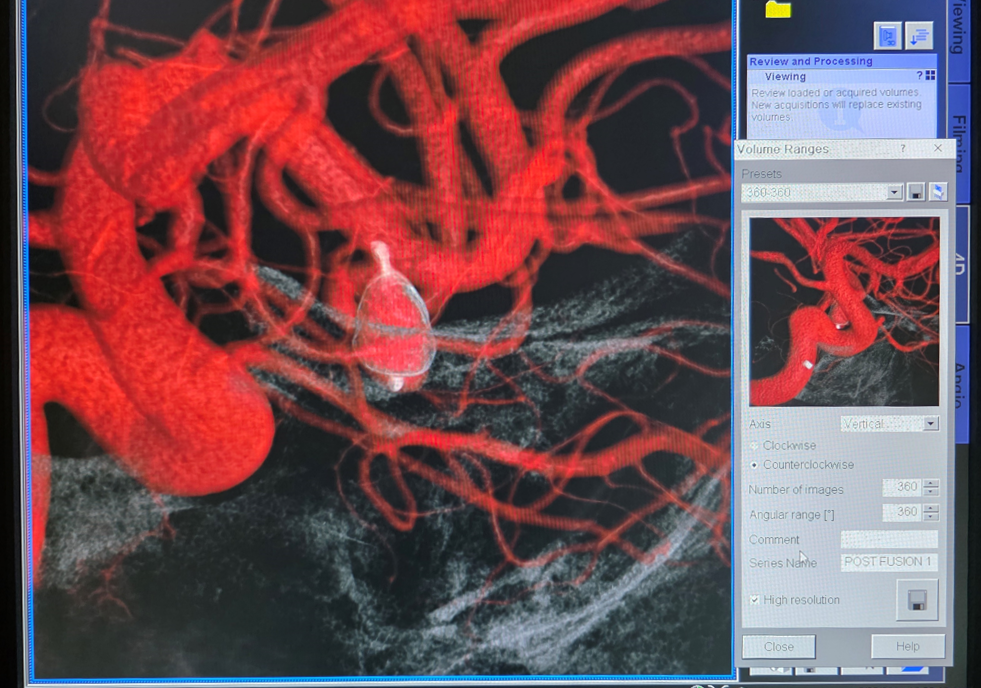
Result:
Back to Cone Beam CT Principles and Practice Page
Back to How to Do It Step By Step Siemens Q Page